Category: Home & Garden

  • Steal This Look: The Ultimate Summery Outdoor Kitchen

    Steal This Look: The Ultimate Summery Outdoor Kitchen

    I’ve always been a skeptic when it comes to outdoor kitchens (who needs anything more than a grill and a set of tongs?). I’m revising my thinking, however, after spotting—and swooning over—the ultimate setup from the Netherlands.

    From WWOO Outdoor Kitchens comes the perfect combination of stylish design and Dutch practicality. Composed of modular components, WWOO kitchens offer systems that range from barely-beyond-basic to well-equipped. Add-ons include a pizza oven, a steel fireplace, and a stainless firebox. WWOO showrooms are located throughout the Netherlands, as well as in Paris; Stuttgart, Germany; Prague; and newly stateside in California.

    Here we’ve deconstructed some of the key elements of the WWOO outdoor kitchen for those with a DIY spirit.

    Appliances


    For a flush counter grill, consider the Fire Master Classic Drop-in Countertop Charcoal Grill; from $407.15 for the 24 by 18 inch version, at Woodland Direct.
    Above: For a flush counter grill, consider the Fire Master Classic Drop-in Countertop Charcoal Grill; from $407.15 for the 24 by 18 inch version, at Woodland Direct.
    For a countertop option, the stainless steel Kavkaz Mini Grill measures 16 inches wide and 12 inches deep (larger sizes available); $219.99 on Amazon. An optional top grate is available.
    Above: For a countertop option, the stainless steel Kavkaz Mini Grill measures 16 inches wide and 12 inches deep (larger sizes available); $219.99 on Amazon. An optional top grate is available.


    This content was originally published here.

  • Decorating Your Yard Enclosed by Split Rail Fence

    Decorating Your Yard Enclosed by Split Rail Fence

    Once your split rail fence is designed, installed, and officially complete you can now get in to the fun stuff! Decorating Your Yard will enhance the overall design and style of your backyard space. It’s time for the fun part! You are adding flowers, seating areas, birdhouses, pavers, and much more. Adding decorations to your backyard can make your space feel more inviting and cozy.

    Decorating Your Yard with Flowers and Landscaping

    The first thing that comes to mind when you think about decorating an outdoor space is landscaping. Trees, mulch, rocks, and flowers are the perfect way to liven up your backyard. Plant flowers that run alongside your split rail fence to not only give you some extra privacy but to help make your fence stand out. You can also plant trees or vines that stand aside from the posts the hold the rails together, creating the illusion that your fence is all plants. Once the vines grow and continue to do so, they will eventually drape along the side and stretch the whole distance of the fence in time. Using mulch and rock underneath your split rail fence will help keep animals in and unwanted animals out by creating a barrier with less room to get in through, plus it leaves a beautiful aesthetic.

    Add a Garden

    When you first install your split rail fence and are designing it, you can implement a portion of it that is boxed in, where you can use as a gardening space. You can use this space to plant and grow flowers, fruits, vegetables, and herbs. Of course, to keep animals out, you can put weld wire across the portion of your split rail fence that is your garden, if you choose not to have it along the whole fence. You can even use your leftover rails and posts from your fencing job as planter boxes or dividers in the garden to help keep the crops separated. With a little bit of acrylic paint or paint markers, you can create some designs and add color to your yard as well as a label where you planted what fruits and veggies, so they are easier to find!

    Birdhouses are a Great Way of Decorating Your Yard

    A unique way to add some wildlife in your backyard without putting your little ones or pups in danger, is to build a birdhouse that can sit alongside your split rail fence on the posts. This is an excellent opportunity to make a craft day for your kiddos and teach them a little bit about wildlife. There are plenty of different designs of birdhouses with some that have feeders on the sides, places for a small birdbath, and of course a space for the mama bird to lay her eggs and raise her chicks. Being able to watch the little birds in their daily life and having some extra decoration on your fence is the best of both worlds!

    Mailboxes and Name Plates

    Some homeowners also choose to outline the front of their property with a split rail fence in the front of their house, which gives the ability to use the posts for your mailbox and nameplates. Most homes have their mailboxes in which you can put yours on a post within your split rail fence, rather than having to add posts in the front of your home, adding more clutter. The fun thing about mailboxes when you own a home is that you can decorate it and give your home a touch of your personality. Something that isn’t for everyone but some people add to the front of their home is a nameplate with their last name listed and the year in which the name was established. These are both small ways you can utilize your split rail fence in a different way.

    Address Numbers

    When it comes to the placement of the address numbers, you have to put them in a place that is easy for people to see and identify. Your split rail fence usually runs right up to the end of your property line, which is the perfect place for your address numbers. They typically are on the front of the home close to the front door, but if you can place them closer to the street and more natural to identify, it would benefit you and your guests!

    These are just a few of the ways you can spice up your split rail fence once it is installed, but your imagination is the only limit!

    The post Decorating Your Yard Enclosed by Split Rail Fence appeared first on Rocky Mountain Forest Products.

    This content was originally published here.

  • Which Bathroom Vanity Will Work for You?

    Which Bathroom Vanity Will Work for You?

    Washstand

    A traditional-style washstand offers timeless, elegant ambience in an all-white bathroom. In this bathroom by ARCHWRIGHT, classic tubular chrome legs with towel rails have been finished off with the palest gray marble top for a sculptural look that blends in unobtrusively with the vintage-look bathroom. The washstand has no drawers or cabinets, so you’d need to use another wall for your storage.

    Single Sink

    Sometimes a single vanity is all you need — or can fit. This modestly sized bathroom is just big enough to fit in a good-size sink with practical cabinet space beneath to ensure that surfaces are kept clutter-free. To further maximize space, choose wall-mounted faucets, too, which enhance the streamlined aesthetic.

    Freestanding

    The curvaceous vanity in this design by Armstrong Keyworth feels more like an elegant piece of furniture than a practical bathroom necessity. The freestanding vanity has a seamlessly molded sink with handy side “wings” for storing and displaying bathroom essentials, plus a black lacquered cabinet underneath to hide the remaining odds and ends. Stick to monochrome for a timeless bathroom design, and highlight with a bright accent for extra pizzazz.

    Perch on a Plinth

    If your storage needs are already covered, your choice of vanity doesn’t need to revolve around umpteen cupboards and drawers. Instead, you can pick a striking piece that emphasizes aesthetics. In this bathroom by Sims Hilditch, a pair of modern sculptural sinks sits on a thick, wall-hung plinth, and the result is a light and airy visual feast. The shelf below is perfect for stashing fresh towels.

    For Kids

    You can never have enough storage when it comes to kids — and that definitely applies to the bathroom. If the younger members of the family are lucky enough to have their own separate bathing area, then try to squeeze in as much cabinet and drawer space as possible. The rainbow stripes on this long, lean vanity by LDa Architecture & Interiors add a sense of fun.

    Big Storage

    If a wall-to-wall fitted bathroom unit is too kitchen-y for your tastes, consider compromising with a sizable vanity equipped with wide, deep drawers beneath. Opt for pure white cabinets, a pale stone top and acrylic handles so the piece doesn’t overwhelm the room, then fill it up with your toiletries for a clean and clear bathroom in minutes.

    Petite

    A vanity can become the star of the powder room if you seek out one with the right dimensions. This Victorian-style number in a design by Jamie Hempsall offsets a traditional sink and faucet with an ornate metal cupboard for a serious dash of vintage style. The graphic wallpaper adds a cool contrast.

    Custom

    You can’t beat a vanity that’s tailor made to fit your space and style. This handsome and luxurious wooden creation designed and built by Chalet is topped with a slab of marble and two inset white sinks. But don’t forget that all real-wood units need to be treated to make them water repellent and resistant to humidity. Avoid direct, prolonged contact with water and make sure the bathroom is well ventilated.

    Wall Mounted

    A “floating,” or wall-mounted, vanity is perfect for compact bathrooms, as the clear space underneath promotes a light and airy look and is easy to keep clean. Choose handleless door fronts with a neat, recessed grip to enhance the streamlined silhouette, as was done in this bathroom by Ellis Architects.

    This content was originally published here.

  • 5 Low-Water Lawns That Stay Green Under Pressure

    5 Low-Water Lawns That Stay Green Under Pressure

    There’s nothing quite like a lush, green grass lawn. Although the year’s dry winter has many homeowners switching to grass-free yards, those low-water alternatives don’t always hit the spot when what you want is soft green turf.

    If you love your grass lawn, but don’t love the constant watering, then you need to check out these five grass lawn varieties. Suitable for every area of the country, these grasses are specially designed to stay thick and green with little to no watering, mowing, or fertilizing.

    Take advantage of warming temperatures and spring rain to overseed your lawn with these varieties now. By summertime, you’ll be enjoying green grass without care.

    1. Eco-Lawn

    Developed from a mix of native fine fescue grasses, Eco-Lawn is the most versatile low-water turf lawn variety. Once established, you can almost forget about it: it doesn’t require regular mowing to stay green, and only needs to be watered during extremely dry periods, if at all.

    Eco-Lawn grows well in bright sun, the dappled shade cast by trees, and the deep shade cast by fences and neighboring buildings. Underplant it with spring bulbs and wildflower seeds for a windblown meadow look, or mow it regularly for a traditional-looking lawn.

    2. Pearl’s Premium

    Once established, Pearl’s Premium grass seed develops roots that extend a foot or more into the ground, making the turf extremely drought-tolerant. Water this lawn once a month or less, and it will still grow a thick, verdant green. This hardy grass also grows slowly, so you only need to mow every month or so.

    3. Fleur de Lawn

    The secret to Fleur de Lawn‘s extraordinary hardiness is its mix of grass and low-growing clover. Clover fixes nitrogen from the air into the soil, which fertilizes the grass and keeps it green year-round; the clover also acts as a “weed you want”, crowding out undesirable plants such as dandelions and crabgrass.

    In addition to these practical perks, clover also adds a sprinkling of color to your lawn in the spring and summer, making this mix perfect for rustic or country-style homes.

    4. UC Verde Buffalo Grass

    Developed by researchers at the University of California, UC Verde Buffalo Grass was designed to withstand hot, dry weather with 75% less watering than traditional turf grasses. UC Verde can be allowed to grow for a tufty, flowing lawn, or mowed every few weeks for a hardy turf lawn perfect for running, playing, and foot traffic.

    UC Verde does best in temperate zones that with winters that stay above 20 degrees and summers that stay below 90 degrees, and will grow best in full-sun areas.

    5. Bluestem Enviro-Turf

    Enviro-Turf is a hardy fescue mix that looks just like a traditional turf lawn but only needs to be mown and watered every couple of weeks. This type of low-water lawn will work best in dry sites with good drainage and has the added bonus of being naturally richer in color than most turf grass lawns.

    Disclaimer: This article is originally posted on Porch. All rights belong to the owner and no copyright infringement is not intended. Contact us if you own this article and want to take this article out of our blog including the backlink on our site. Thank you very much!

    This content was originally published here.

  • Remove bird feeders to battle spread of deadly parasite, bird society urges

    Remove bird feeders to battle spread of deadly parasite, bird society urges

    HALIFAX — Nova Scotians are being asked to remove bird feeders and close up bird baths as a fatal disease spread by damp, human-provided seed is killing purple finches.

    David Currie, president of the Nova Scotia Bird Society, says the cases of trichomonosis around the province are an annual occurrence, but they seem to have arrived quickly and intensely during a particularly cool and wet spring.

    The fatal disease is caused by a tiny parasite being transmitted from bird to bird through moist bird seed, wet areas and in bird baths.

    Currie says there have been seven reports of the disease around the province, prompting his group to suggest people follow the advice of the Canadian Wildlife Health Cooperative and remove the feeders and bird baths.

    The parasite causes inflammation of the bird’s glands and windpipes, leading to lethargy and making it difficult for the birds to breath.

    Currie said it primarily harms purple finches, which aren’t currently endangered, but the fatal illness occasionally spreads into other seed-eating birds.

    This content was originally published here.

  • How to Care for Orchids and Help Them Bloom

    How to Care for Orchids and Help Them Bloom


    With a cluster of delicate-looking blooms clinging to one or two extended stems that are flanked by elongated, bright green leaves, the simple beauty of the orchid has made it a favorite household and office plant, and makes it one of the best flowering indoor plants, period!

    Orchids are available year-round at florists, greenhouses, and even the floral sections of some grocery and department stores. There are many colors, sizes and price ranges to choose from, and you can expect to pay anywhere from $9.99 for a mini orchid to upwards of $35.00 or more for a larger orchid plant in most New England retail settings. To get the most out of your purchase, follow these tips on how to care for orchids.

    How to Care for Orchids

    Orchids have showy , yet delicate, blooms that make a bold statement.

    Pixabay

    Before purchasing an orchid check the overall health of the plant.

    How to Care for Orchids and Help Them Bloom

    How to Spot a Healthy Orchid

    1. Is the stem sturdy? Avoid plants with limp, brittle, and damaged stems.
    2. Are the leaves bright green and free of damage and discoloration? Avoid brown, withered, shriveled and/or discolored leaves.
    3. Are the buds of unopened blooms intact, or if the orchid is already in bloom, do the flowers appear bright, full, and secure on the stem? Avoid plants with faded or wilting flowers or loose or missing blooms.

    Once you have selected a healthy specimen, the goal is to help the orchid flourish and bloom as often as possible. After the plant has flowered, the blooms will stay open anywhere from several weeks to a few months — sometimes even longer— when kept in ideal conditions.

    Ideal Conditions for Orchids

    Temperature: Most orchid plants do well in a daytime temperature of 65–75 degrees and a nighttime temperature of 56–70 degrees.
    Humidity: Orchids prefer about 60 percent humidity in the air, but they also need a spot where there is good air circulation. Humidifiers and fans can be used to adjust air quality.
    Watering and Feeding: Water about once a week. Do not over water, and — if possible — mist instead with non-chlorinated water that is kept at room temperature. Do not let their “feet” sit in water. Follow fertilizing directions from the orchid’s packaging.
    Soil: Soil should be loose and never compacted.
    Light: Orchids prefer bright, filtered light, and will not flourish in dimly-lit rooms.

    After flowers have completely dropped from the plant, it is time to prep the orchid for re-blooming.

    orchid stem growing

    This orchid is in the process of sending up a new stem after already blooming once.

    Brenda Darroch

    How to Care for Orchids to Encourage Re-blooming

    1. Cut the stalk back to about half the current length.
    2. Seal the cut end with a dab of melted wax to protect the cut from exposure to bacteria.
    3. Move the orchid to a cooler area that receives less light for a few weeks to allow it to store up energy before re-introducing it to more light and warmer temperatures again.

    Within a few weeks or months — depending on the location of the orchid — new growth should appear near the cut site. Orchids are known to be slow-growing and the re-bloom time can take anywhere from several weeks to several months after the new growth appears. But as enthusiasts know, it is well worth the wait to have an orchid bloom again.

    Do you have your own favorite orchid care tips? Let us know in the comments!

    This post was first published in 2013 and has been updated.

    SEE MORE:
    Sun-Loving Houseplants | 5 Windowsill Choices
    African Violets Care and Feeding | Grow Healthy African Violets
    Succulent Care and Display Tips

    The post How to Care for Orchids and Help Them Bloom appeared first on New England Today.

    This content was originally published here.

  • Gravel is back in fashion, says plant expert, as gardeners try to save water

    Gravel is back in fashion, says plant expert, as gardeners try to save water

    Gravel in your your garden is back in fashion, a plant expert has said, as gardeners try to save water.

    While many are proud of their vibrant green lawns, gravelled and stony areas creating “dry gardens” which require less watering are becoming more fashionable, top horticulturalist Michael Perry has said. 

    He told Gardeners’ World Live: “There’s a new trend called xeriscaping which is when you plant your garden to need watering as little as possible. This is why the plant of the year at Chelsea won. 

    “People are gravelling over their garden and planting up succulents to save water- the trend has come over from America.

    “Funnily enough this is something we saw as popular in the 80s- but it’s come back now.”

    Xeriscaping is when you plant your garden to not need much water, choosing Mediterranean plants and succulents and using gravel. This also makes a garden lower effort as less watering and pruning is needed. 

    He added: “People are definitely becoming more aware of planting for our changing climate, and the Dry Garden is a perfect example of how to achieve a beautiful garden when you can’t rely on the rain to keep the plants watered.

    This content was originally published here.

  • Why Tesla’s Solar Roof Is A Bargain, 53% Of The Price Of A Roof + Electricity

    Why Tesla’s Solar Roof Is A Bargain, 53% Of The Price Of A Roof + Electricity

    Published on June 13th, 2019 | by Kyle Field

    Why Tesla’s Solar Roof Is A Bargain, 53% Of The Price Of A Roof + Electricity — CleanTechnica Analysis

    Were Elon Musk’s Claims About The Cost Of  Tesla’s Solar Roof Accurate? Is Tesla’s Solar Roof Tile System Cheaper Than Buying A Roof & Grid Power?

    When Tesla CEO Elon Musk unveiled the company’s Solar Roof tile system back in 2016, he boldly proclaimed that it would cost less than buying a roof and electricity. Since then, we have not seen any data to support his claim, until now.

    I signed a contract with Tesla for the installation of a new Tesla Solar roof tile system and have unpacked the details, good and bad, from the contract in a series of articles. To kick things off, I will start by comparing the cost of the system against Elon’s claims to see if a Tesla Solar Roof tile system is actually cheaper than buying a roof and the power generated by the system over its life.

    One Roof To Rule Them All

    An accurate comparison requires an accurate baseline to be used for the cost of electricity and the cost of a new roof. Getting a new roof installed can range from $10,000 to $50,000, depending on the material used. Composite shingle roofs and tile roofs are more cost effective, but do not have the same durability as a Tesla Solar Roof with its tempered glass tiles. Tesla’s Solar Roof  is comprised of, “Glass solar tiles are so durable they are warrantied for the lifetime of your house, or infinity, whichever comes first.”

    Which one is a Tesla solar roof tile?

    Posted by CleanTechnica on Thursday, June 13, 2019

    The only roofing product on the market that comes close to this bold proclamation is a metal roof with an expected 50 year life. This is an important comparison to understand because just looking at the Tesla Solar Roof as simply the covering for the home already sets it apart from most common roofing products. It is a high-end roof, even without the solar aspect. This is not a justification for a higher price, but it is simply the reality of buying a roof that lasts.

    The Tesla Solar Roof is not a typical roof, and that is highlighted in the fact that it comes with two different guarantees. The first is for the solar production from the roof. The solar production from the Solar Roof is guaranteed for 25 years. This protects the buyer from subpar solar cells, cells failing, or other factors that impact the electrical generation from the system. Such a guarantee is standard across the solar industry. The second warranty is for the physical roof structure. Because the Tesla Solar Roof is a building-integrated photovoltaic (BIPV) system, in addition to generating power, it also must serve as the physical roof for the house. As a roof, the Tesla Solar Roof is warrantied for infinity or the life of the home, whichever comes first.

    To ensure accuracy, I went out and got bids for the job from 5 real local contractors in Southern California. This was not a hypothetical exercise, as we are in need of a new roof and were actively pursuing both options to determine which was a better fit for our family. Bids were made based on actual permitted architectural drawings of the roof, with all associated wrinkles and warts. After receiving all of the bids, I took the average price from all 5 contractors and used that as the baseline cost for a comparable roof installation. That came to $37,865.80 for a new metal roof.

    Electricity By Any Other Name

    Musk and his team of energy engineers at Tesla were not simply trying to build a better roof. They were ultimately trying to build a solar product that would help the masses to adopt solar because it was easier, cheaper, higher quality, and better looking. That is a tall order to fill, by any measure.

    On the cost side of the equation, it is a simple matter of taking the cost of electricity from the U.S. Energy  Information Administration (EIA) and extrapolating that price out over 25 years. I used the most recent cost of residential electricity in California of 19.3 cents/kWh (March 2019) and extrapolated that out using a conservative 2% annual increase. For parity, I priced the system out using the production of the solar system, following the maximum degradation noted by Tesla. Over the 25 year warrantied life of the solar production from the system, the Solar Roof system should generate $73,436.14 worth of electricity.

    Sizing The Solar Roof

    We do not have a gas line running to our home, so everything in the home runs on electricity. We also have two electric vehicles that pull the vast majority of their electricity from our home. To offset as much of this consumption as possible, we are installing the largest Tesla Solar Roof tile system that our roof can handle.

    System sizing on a Tesla Solar Roof is done differently than traditional solar systems, where the number of solar panels used depends on the need and roof capability. Because a Tesla Solar Roof has to serve as a physical cover for the house as its primary function, tiles must cover the entire surface. To size the system, Tesla has developed tiles that have solar cells and tiles that do not — and they all look essentially the same. For smaller systems, Tesla simply uses fewer tiles containing the actual solar cells.

    The Tesla Solar Roof for our home has solar cells in every location possible. There are some areas around the edges of the roof and near the hips and joints without cells, but every other surface is setup to produce power. The primary surface of our roof faces south, which is ideal for solar production, but the configuration we are using utilizes the north-, east-, and west-facing roof surfaces as well. That does indeed maximize our solar generation, but results in a lower yield from the system compared to a system with all active tiles facing south.

    The Data

    All told, Tesla was able to fit a 10.59kW system in our roof, which it expects will produce 13,126 kWh in its first year of operation. This is the equivalent size of a system of 32 x 330 watt solar panels! The system, which I’ll remind you also serves as the roof for our home, came out to $70,375.23 before rebates and $58,603.04 after rebates. Compared to the cost of a metal roof, the Tesla Solar Roof was $20,737.24 more.

    Translating this data into nerd-speak, aka an Excel spreadsheet, we can see that the cost of installing a metal roof and simply buying the equivalent of the electricity produced by the Tesla Solar Roof system would equal $111,301.94, whereas the Tesla Solar Roof is only $58,603.04. These are not hypotheticals or mythical numbers, just a simple summary of expenses in two different scenarios over 25 years. Said another way, the Tesla Solar Roof is 52.7% of the cost of installing a comparable roof and just buying power from the utility.

    What About A Composite Shingle Roof?

    Costing out a Tesla Solar Roof versus a metal roof is interesting, but that’s still a really expensive roof. Musk said at the company’s annual shareholder meeting on June 11th, 2019, that the Solar Roof team was really pushing to beat even the ubiquitous composite shingle roof. Using the single estimate we received for a composite shingle roof for our house at a mere $12,000, the Solar Roof system still comes out on top.

    We can use the same $73,436.14 for the value of the electricity produced and $12,000.00 for the composite shingle roof for a total of $85,436.14. That includes the cost of electricity over the life of the system from the utility and the physical composite shingle roof. Compared to the $58,603.04 for the Solar Roof, composite shingle is already more expensive here in Southern California.

    In fact, even if I throw in the roof itself as free, the Solar Roof is cheaper than simply buying power from the utility here in California, for a savings of almost $15,000 over 25 years. It won’t make or break your retirement, but it is impressive to see that the Solar Roof is already holding its own against roofing materials of any type in California. In fact, that is conveniently close to the installed price of two Tesla Powerwalls, so throw those in for some extra resiliency and call it a day.

    The payback time for the Solar Roof will vary state by state and utility by utility, so be sure to run your own numbers before pulling the trigger on your own system. We spent months looking into this topic. Check back here at CleanTechnica for more analysis of the Tesla Solar Roof system as the installation of our system progresses.

    If you are in the market for a Tesla, find someone locally that you know (like in real life) and use their referral code. If you don’t know anyone with a Tesla, go find someone at your local Supercharger and try not to be a creep and ask them for their referral code (they won’t mind). If that doesn’t work, ask ac co-worker or a distant relative, post on Facebook or Twitter or just hit up Google. If all that fails and it’s an odd numbered day and not too sunny out, you can use my 

    I’m a tech geek passionately in search of actionable ways to reduce the negative impact my life has on the planet, save money and reduce stress. Live intentionally, make conscious decisions, love more, act responsibly, play. The more you know, the less you need. TSLA investor.

    This content was originally published here.

  • How To Make A DIY Modern Platform Bed | Sia Magazin

    How To Make A DIY Modern Platform Bed | Sia Magazin

    Today on Shape And Explore I’m making a Modern Platform Bed using dimensional lumber from my local home centre. The idea behind this project was to create a bed that emphasizes the low horizontal lines within my bedroom.

    source/image(PrtSc): Shape And Explore

    To help distract from the low ceilings in my basement apartment.The design features clean straight lines, and is versatile enough to pair well with multiple bedroom layouts and styles. Watch the video from Shape And Explore for more info:

    This bed is easy to build and maintaining it is even easier. All you need to learn is some necessary carpentry skills. Get the required tools, take proper measurements for the bed, drill the holes for putting screws and then attach the frames.

    After the finishing touches are done, set your bed with the perfect mattress and you’ll be all set with a new bed at home. This cozy bed would be perfect for your lazy weekend escapades.

    This content was originally published here.

  • What’s Cooking Outdoors: Trends in Outdoor Kitchen Design for 2019

    What’s Cooking Outdoors: Trends in Outdoor Kitchen Design for 2019

    Whether grilling by the pool at a bustling family barbecue or savoring a quick meal on the patio on a quiet evening, the simple joy of eating outside is a pleasure in and of itself. However, cooking outdoors with all the amenities of a fully-furnished kitchen can transform outdoor dining into an experience that will delight recreational cooks and professional chefs alike.

    From granite countertops to natural stone veneer, your local Swenson Granite Works’ store can provide you with a range of products to create a timeless outdoor kitchen that makes a bold statement of unmatched durability.

    This year’s outdoor kitchen trends offer exciting ways to create an inspiring culinary space in your own backyard.

    Year-Round Livability

    The backyard has always been a popular hangout spot for warmer days, but today’s homeowners are looking for ways to make their outdoor kitchens a more livable extension of the indoor living area.

    Mike Corsie, Founder of Terrapin Landscapes in Kennebunkport, Maine, names livability as a major trend in recent years.

    “Homeowners are using their outdoor spaces more often, and they want them to be more comfortable,” says Corsie. “Most of these larger outdoor living spaces include a kitchen and dining area.”

    Lighting and heating features can make outdoor kitchens usable on cooler and darker nights as well, meaning backyard enjoyment is no longer limited to weekends and summers. Investing in high-quality, long-lasting furniture and materials is another great way to make your backyard space more livable year-round.

    Colorful softscape creates a seamless transition from the natural surroundings to the stone design of this home in Kennebunkport, Maine. Landscaping by Terrapin Landscapes. Kitchen designed by homeowner and builder, Jon Trudo of Creative Coast Construction. Kitchen features Woodbury Gray granite inlays, countertop and pillar caps.

    According to Corsie, functionality is a growing trend as outdoor kitchens become more popular. “People are more interested in cooking outside, and it can’t just look pretty, it has to be a good blend of fashion and function.”

    As most experienced outdoor entertainers would agree, one of the biggest hassles of dining al fresco is transporting food and dinnerware back and forth from the indoor kitchen to the outdoor dining area. However, a fully functional outdoor kitchen—complete with everything from a refrigerator and storage to a recycling and trash area—can transform outdoor meals from impractical occasions to regular weeknight routines.

    A fully functional outdoor kitchen with a sandblasted Woodbury Gray granite countertop and Connecticut Blend Ledge thin veneer add warmth and a natural aesthetic to this spacious Rhode Island backyard patio. The patio pavers are Woodbury Gray granite. Project by Magma Design Group.

    Natural Stone Features

    Durability is always an important factor in hardscape design, but it is especially critical in outdoor kitchens due to the heavy wear and tear they endure.

    “I advise homeowners to always use the highest quality materials possible to ensure that (their outdoor kitchen) is going to withstand the elements,” says Corsie. “I prefer to work with natural stone, especially locally-found materials (in order to) design something that fits with the natural landscape.”

    He recommends natural stone as one of the best materials to use in an outdoor kitchen. Not only is natural stone an excellent way to complement the native landscape, it is also virtually maintenance-free. These hardwearing properties make it ideal for countertops, veneer, patio pavers and walkways in and around a backyard cooking space.

    For countertops, granite and bluestone—which naturally prevent bacteria growth—are outstanding options and will provide unbeatable utility in an outdoor kitchen. “Granite is always the most popular because everyone knows of granite as being strong and durable, especially in Maine where it’s locally available,” says Corsie.

    Natural stone veneer is an excellent way to visually frame your outdoor appliances, and it will withstand the elements much better than wood or tile. Swenson’s natural stone veneer comes in granite, limestone, fieldstone and quartzite, and can be installed in a variety of shapes from modular square and rectangular patterns to more organic round or mosaic arrangements.

    A compilation of natural stone and granite were used to create this outdoor kitchen. The countertop and facing are polished Woodbury Gray granite.

    This New Hampshire poolside outdoor kitchen features Swenson Weathered Quarry veneer and a bluestone countertop. The patio pavers are full color bluestone. Project by Steve Desmarais Contracting.

    Built-in Seating

    Homeowners with scenic backyards often prefer materials that preserve the natural aesthetic of their space. However, when it comes to functional elements like furniture and seating areas, it can be difficult to find pieces that feel natural in a backyard landscape. For these reasons, built-in seating has become a popular option.

    Built-in seating has been trending for years in outdoor living rooms, and now it’s making its way into outdoor kitchens. A seat wall will save space and complement natural stone veneer or patio pavers, all while accommodating more guests.

    Built-in seating is also an excellent option around a fire feature, like an outdoor fireplace or fire pit. Corsie often incorporates a built-in seating wall on one side of a fire pit with chairs placed across.

    An outdoor kitchen area in Hollis, New Hampshire features Woodbury Gray granite wall caps that can be used as seating around the fire pit. Also featured are Woodbury Gray granite rock face steps, a full color natural cleft bluestone patio, honed Woodbury Gray granite grill countertops and Boston blend mosaic thin veneer. Project by Northern Lights Landscape Contractors.

    Stainless Steel Cabinets

    A fully functional outdoor kitchen will need storage space for dinnerware, utensils, and other accessories. Since wood cabinets can be problematic for outdoor storage, stainless steel cabinets are growing in popularity due to their weather and insect-resistant properties. They are also easy to clean, visually appealing, and easily customizable.

    “You can choose multiple door-and-drawer combinations, sink units, pullout trash bins, and lockable storage (as part of the cabinets)”, explains DIY Network.

    Many homeowners like the way stainless steel cabinets complement both outdoor grills and natural stone elements simultaneously. However, if you prefer the appearance of natural wood, stainless steel cabinets can be coated with a realistic wood finish.

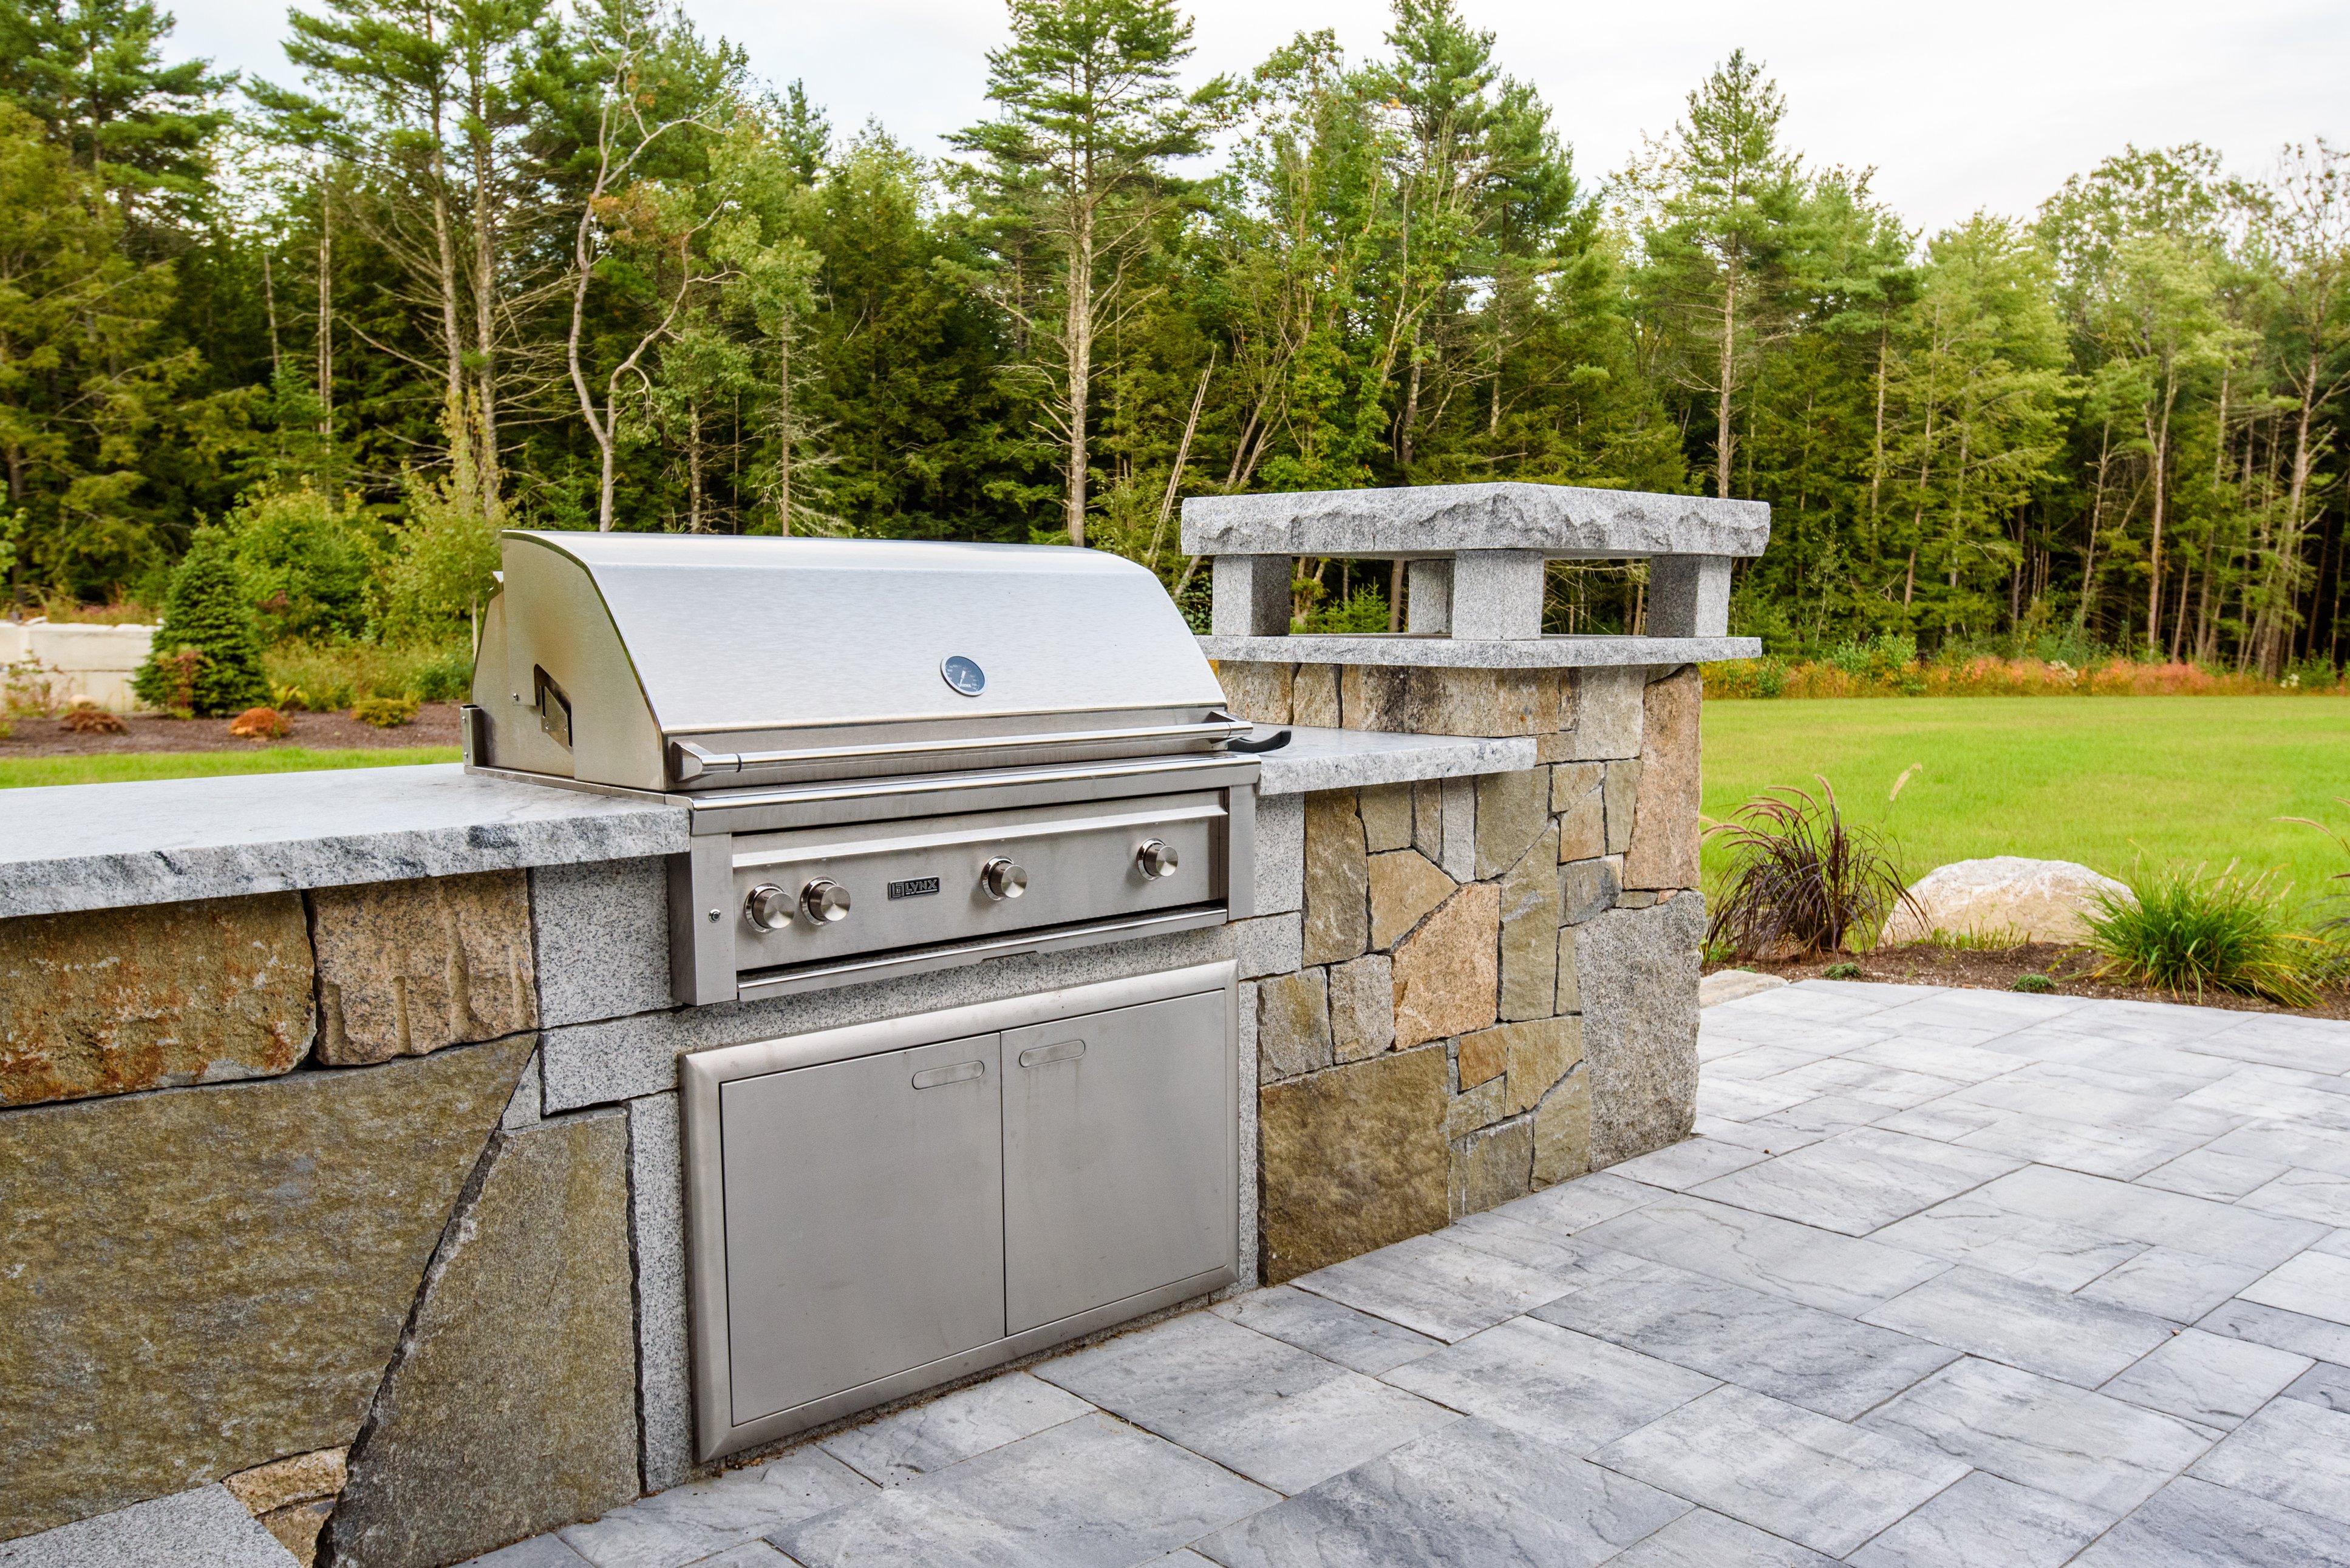
    Woodbury Gray granite countertops and inlays complement the 42” Lynx Pro Series Grill and around stainless steel storage doors. A pillar with double Woodbury Gray granite caps conceals a light fixture to create a glowing focal point at night.

    Versatile Grills

    Grills aren’t just for making burgers and hotdogs anymore. Homeowners are now looking for flexibility in their outdoor grill stations, seeking out grills that are designed to prepare a larger variety of foods. Hybrid and Kamado-style grills are two great options for outdoor cooks looking to expand their culinary capabilities.

    In terms of popularity, built-in models have significantly surpassed stand-alone barbecues in luxury outdoor kitchens within the past several years. “These days at least 75% of sales of high-end grill companies are generated by built-in models, versus cart versions,” says Kalamazoo Gourmet. With hundreds of premium built-in models available, the possibilities for customization are nearly endless.

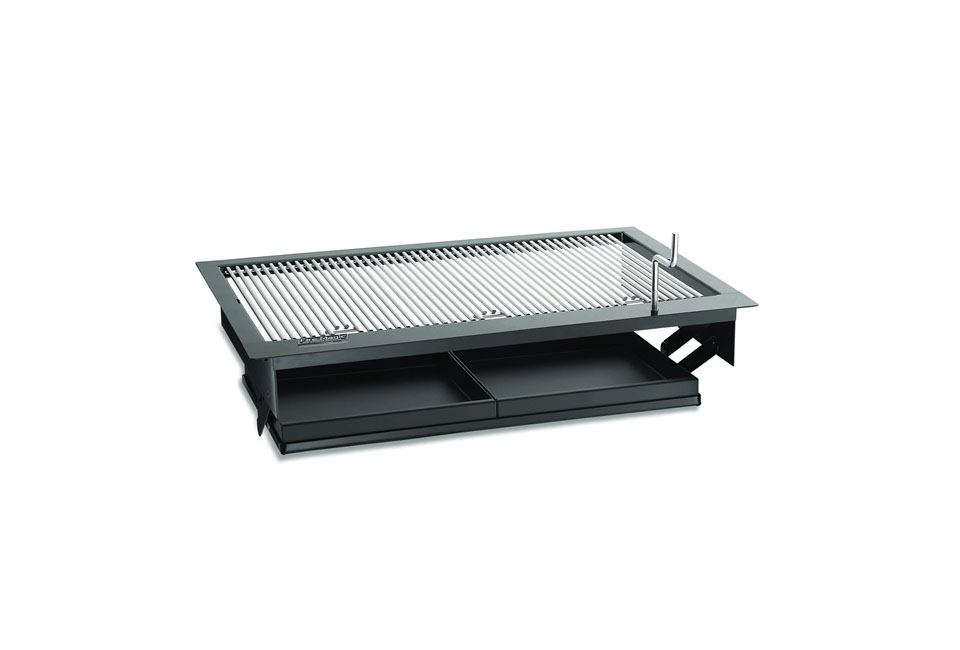
    Hybrid grills, which easily switch between charcoal and gas, are a popular option for year-round grilling. They combine the convenience of a gas grill with the delicious smoky flavor that only a charcoal grill can provide.

    This Kalamazoo Hybrid Fire Grill even offers wood grilling in addition to charcoal and gas. A drawer below the barbecue can either be filled with wood or charcoal, or left completely empty for gas-only grilling.

    Another popular option for outdoor grilling is the highly versatile Kamado-style grill, perfect for cooking everything from a slow-roasted chicken to baked bread in the comfort of your backyard. Its wide temperature range of 225° to 750°F makes it a convenient, all-in-one option for grilling, baking, roasting, and slow smoking.

    Not only does a Kamado grill require less charcoal than a conventional grill, but it also provides even heat distribution to cook meats thoroughly without removing moisture. The Spruce Eats recommends the Kamado Joe Classic II as the best overall grill in its category.

    Grill features are also trending this year. Side burners are great for making sauces or boiling water, and some grills even come equipped with a motorized rotisserie.

    Backyard Pizza Oven

    A custom pizza oven is a perfect addition for those who want to bring a taste of Italy to their backyard kitchens. Although it comes at a higher price point and requires more installation time than a standard grill, this exciting backyard feature is well worth the investment.

    For those who want to create an artisan pizza kitchen in their own backyard, DIY Network recommends several stainless steel and wood fired options.

    Overhead Structure

    Overhead structures provide shelter from the sun and heat during the hot summer months. They can be made of natural or manmade elements, or a combination of the two, and are easily customizable to suit any backyard.

    Patio covers, which provide ample shade in any weather, are often designed as an extension of the house with a solid roof. They are particularly beneficial in areas with long, scorching summers because they offer complete full-shade coverage.

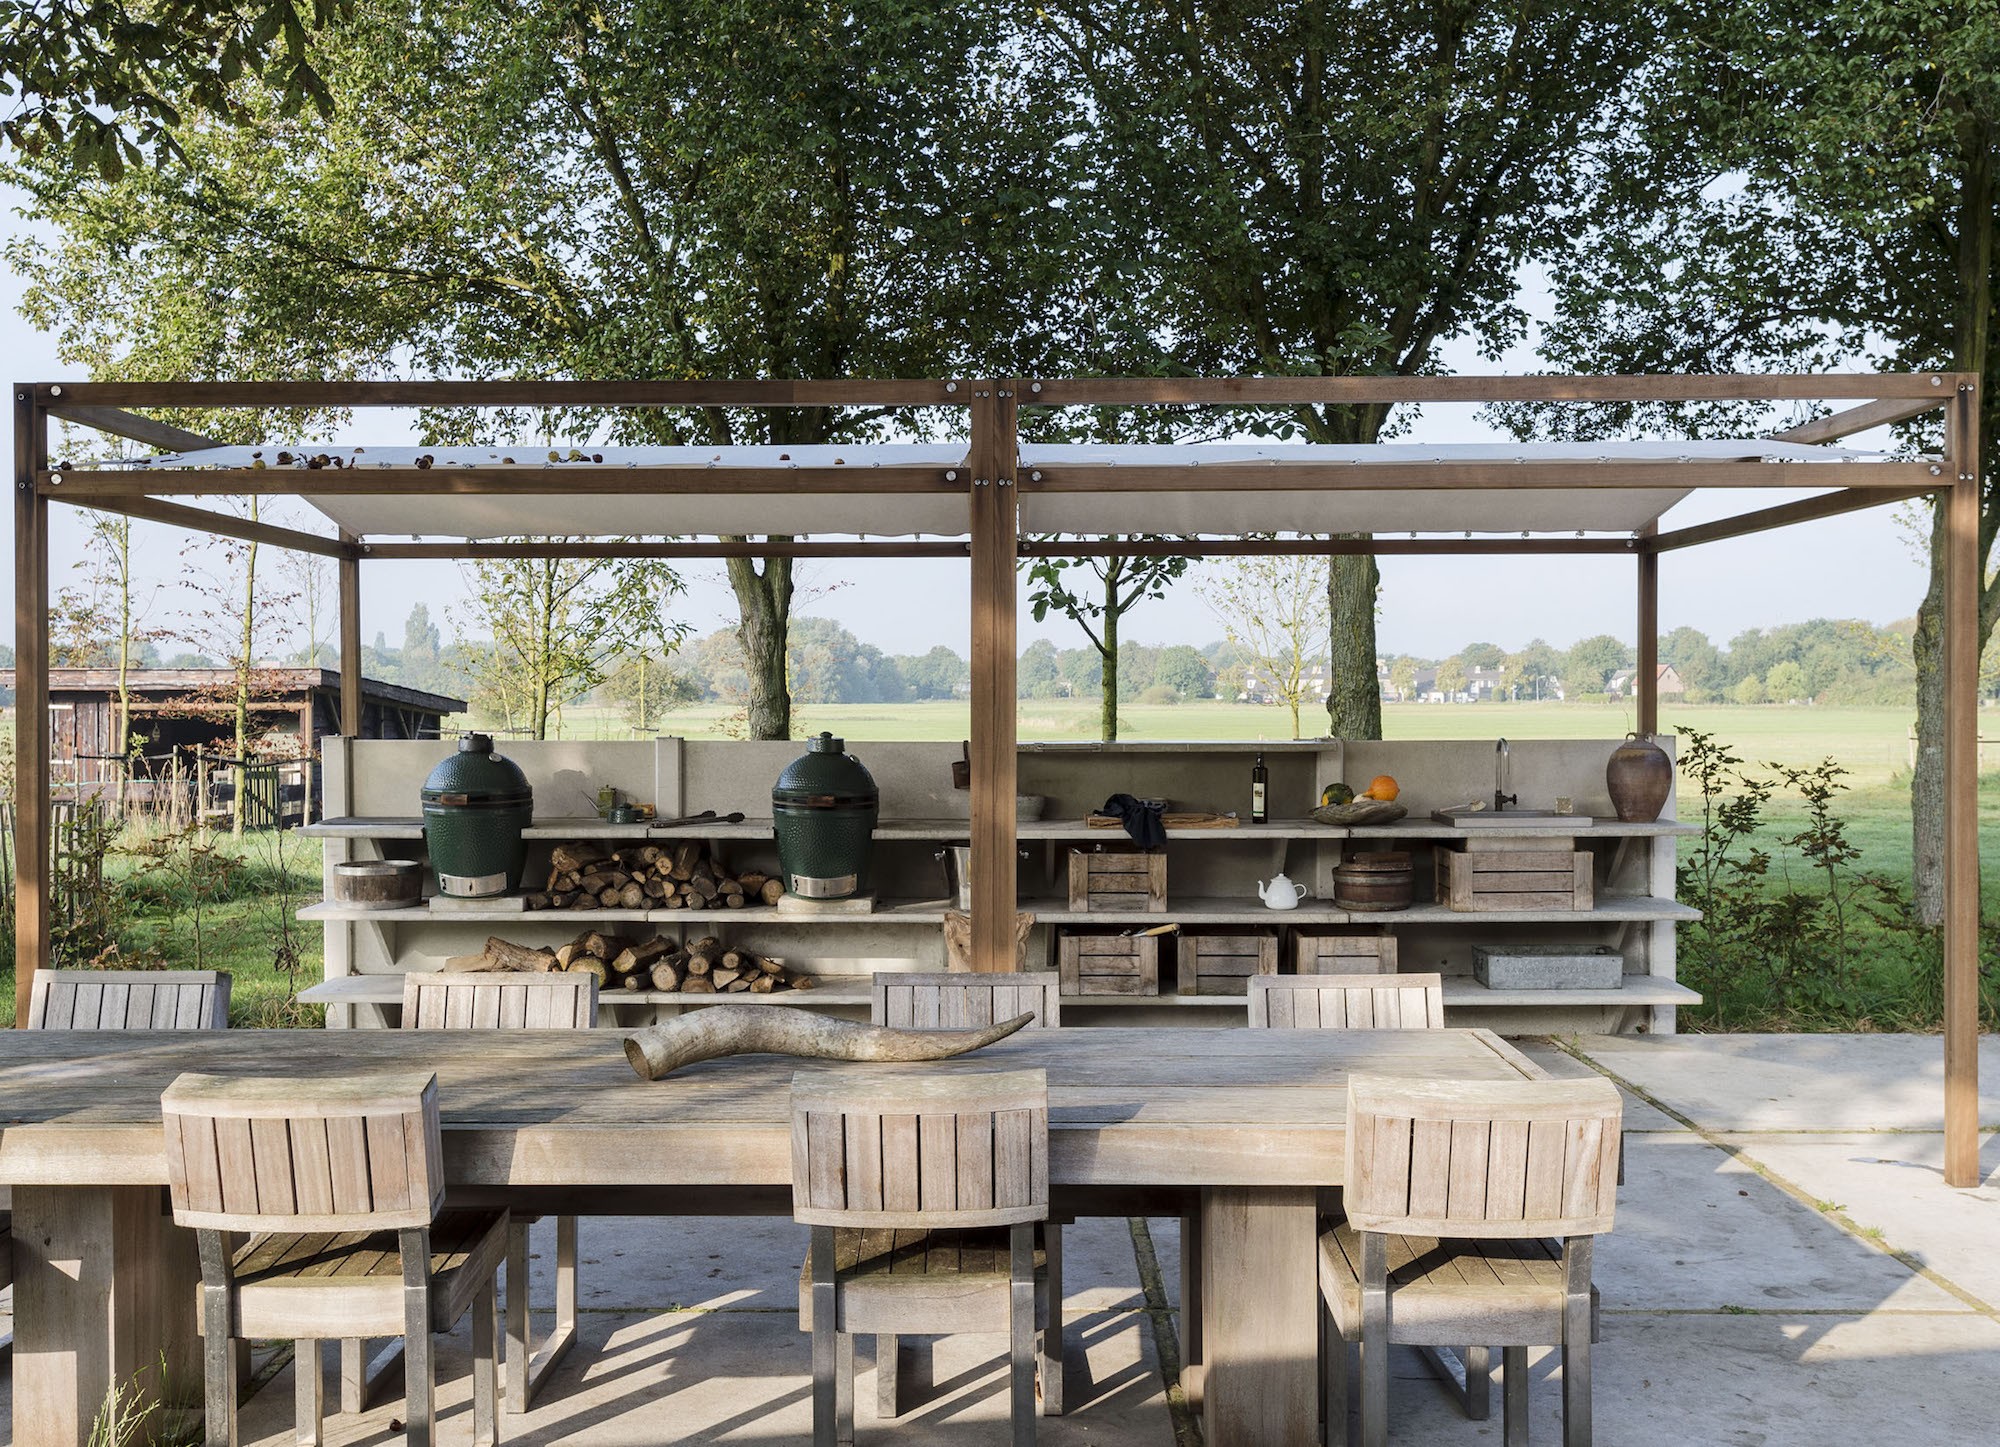
    Pergolas, on the other hand, are a great partial-shade alternative to patio covers. “Pergolas provide a little bit of shelter and shade without completely obstructing the view and experience of being outside,” says Corsie. They can either be decorated with vines or other plants or installed with retractable canopies for particularly hot days.

    This cozy patio with a pergola at this Hollis, New Hampshire home features full color natural cleft bluestone. Boston Blend ledgestone thin veneer, along with 2” thermal top Woodbury Gray granite wall caps and countertop, accentuates the space. Project by Northern Lights Landscape Contractors.

    Planting is another great option for providing shade that can double as protection from the sun and a screen for additional privacy. Homeowners can choose from a wide range of trees and shrubs that suit their local climate and surrounding scenery.

    Clever Accessories

    An outdoor kitchen wouldn’t be complete without handy and versatile accessories to provide a finishing touch. This year’s top trending favorites are clever gadgets that simplify cookouts of all kinds.

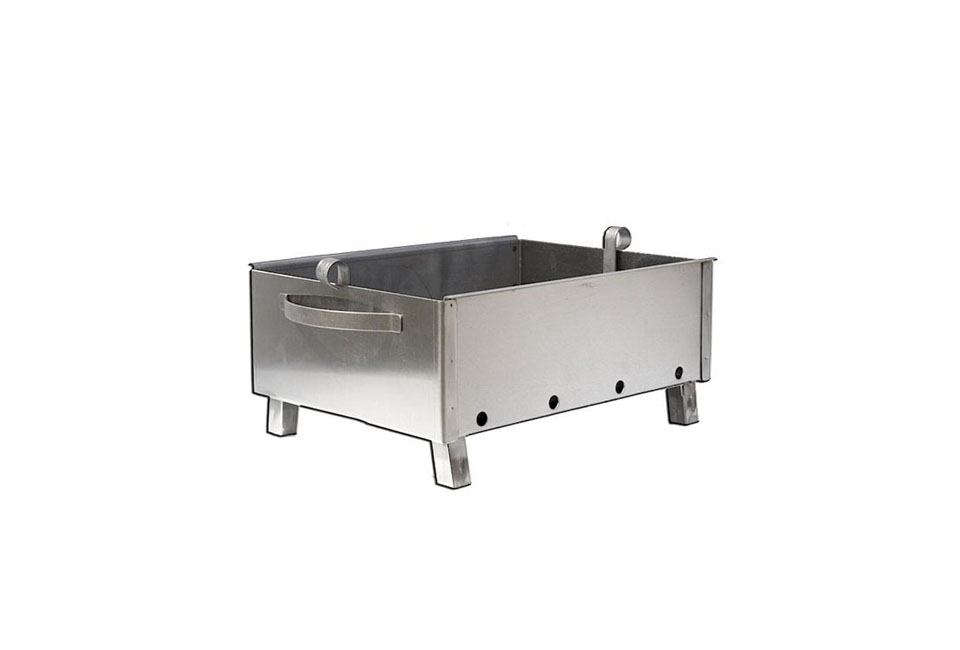
    Illuminate your grilling station with the Portable Bullet Barbecue Light, a durable, stainless steel instrument for lighting your grill station at night.

    Then start your barbecue with the Looftlighter, an electric fire starter that lights charcoal or kindling in less than 60 seconds, making it perfect for lighting any charcoal grill or wood fireplace.

    Prepare mouthwatering shish kabobs with this set of four stainless steel sliding skewers from Williams Sonoma, specially designed with a sliding disc for easily removing cooked meat or vegetables.

    After grilling, use the Grand Grill Daddy, a heavy-duty brush, to steam-clean your barbecue. This tool makes cleaning easy and is safe to use on stainless steel and iron grill grates.

    Our thin veneer spec sheet will help you choose the right material for your outdoor kitchen. Download it here.

    This content was originally published here.