Category: Home & Garden

  • How To Grow Finger Lime Trees In Pots No Matter Where You Live

    How To Grow Finger Lime Trees In Pots No Matter Where You Live

    How To Grow Finger Lime Trees In Pots No Matter Where You Live

    The Finger Lime tree (sometimes referred to as Caviar Lime) is native to Australia and true to its common name, the small elongated fruit is the size and shape of a fat finger. If it’s not yet as popular as it should be, that’s not for any lack of demand. The production of this gourmet item just cannot keep up with the demand in culinary circles. This is one good reason to grow your own.

    This small citrus species is cherished for its tiny, juice-filled pearl-like vesicles, which give it the epithet ‘lime caviar.’ They may be green, white, pink or red, depending on the variety. Served as a topping on seafood, salads or soups, they give a surprising twist to the dish as they burst on the tongue releasing their tangy citrusiness.

    The Finger Lime TreeIn Its Natural Habitat

    Native to the lowlands of New South Wales and Queensland, the Australian Finger Lime (Citrus australasica) tree typically grows wild in warm and humid subtropical rainforest. It is more of a large shrub than a tree and forms the understory in coastal forests. Therefore, it prefers slightly acidic soil and a partially shady to sunny locations.

    The Finger Lime tree doesn’t exactly look like your typical lemon or lime tree, although it has plenty of sharp thorns. The leaves are rather small and the branching is irregular. The small fruits measuring 1-4 inches, resemble legume pods as they hang from the branches. They may be various shades of green, red, brown or black.

    Finger Lime trees can tolerate cold weather to some extent, but not frost. Established plants can withstand drought, but even moisture in the soil is preferred. It is particularly important for young plants.

    Growing The Australian Finger Lime Tree

    Australian Finger limes were originally a bush food that early settlers foraged from the wild. As it started getting attention from the culinary world, commercial cultivation began in the 1990s. The fruits were still not seen outside the continent until the early 2000s.

    Grafted rootstock is commonly used as planting material. Finger Lime trees can be grown from seeds and semi-hard cuttings, but they have some drawbacks. Seedlings grow very slowly and usually take up to 15 years to start fruiting. They are also more particular about growing conditions. As for those grown from cuttings, they often fail to thrive and are more vulnerable to diseases.

    Grafted rootstocks will give you mature plants much more quickly. They could start fruiting in just 2-3 years, although it may take another 3-4 years for them to have a good yield. Another advantage of grafting is that rootstocks that can withstand adverse climatic conditions could be used, which makes the trees more tolerant of the vagaries of nature.  

    Considering their natural growing conditions, coastal Florida and California may be ideal for growing Finger Lime trees out in the garden. However, they can be successfully grown in pots irrespective of where you live, as long as you provide natural growing conditions. As a matter of fact, growing Finger Lime trees in pots has several advantages.

    Maintaining Correct Soil pH

    The Australian Finger Lime tree does well in a pH range of 5 to 6.5. It’s easier to maintain this condition in containers than in the ground.

    Providing Good Drainage

    The Finger Lime tree naturally grows in areas with high humidity and frequent rains, especially in summer. Although it can tolerate short periods of drought, it prefers evenly moist soil, but with good drainage to avoid waterlogging.

    Protection From The Elements

    These shrubby trees need to be sheltered from the wind and cold not only when they’re young. Mature trees and their fruit are also susceptible to wind and cold damage. Too much hot sun can also burn the fruit. When the fruits are maturing, a rogue shower can cause them to split and rot to set in. Those growing in containers can be moved to a protected location whenever required.

    Harvesting Mature Fruit

    Finger limes are best when they mature on the tree. You not only get the best flavor, but the fruits keep for a long time without damage. Harvesting on time is easy when this tree is grown in a container.

    Controlling Size

    Finger Lime trees are naturally small in size, which makes them ideal for growing in containers. However, their thorny branches may need occasional pruning. This, as well as picking fruits, is a lot easier with pot-grown plants.

    Checking For Pests & Diseases

    Finger Lime trees are not very disease-prone, but fungal rusts, scale, and aphid infestations are common. In areas with lots of citrus trees, attack of citrus gall wasp may be a problem. It is easier to check for and identify problems when you have the tree in a container. It is also protected from common soil pathogens, especially nematodes.

    Growing The Australian Finger Lime Tree In Containers

    Choose The Right Container

    Choose the largest size pot that’s practical for you. You don’t want to shock your Finger Lime tree by frequent repotting. Start with a 5-gallon pot at the least, to give enough space for the roots to spread out. A larger container, 15-gallon or bigger, is even better, but it can also be difficult if you need to move it frequently. Keeping the container on a heavy duty plant caddy might help – you can buy them here on Amazon.

    A terracotta or plastic container will do. Terracotta is better if you tend to overwater and plastic pot if you’re likely to forget the schedule. Whatever the material, the most important consideration is drainage. The Finger Lime tree likes regular watering, preferably every 3-4 days, so the container should have holes to let the excess water drain away. Grow bags are also a good option because they allow water to evaporate faster.

    Read Next: 40 Unique & Fun Container Garden Ideas

    Use Good Quality Potting Soil

    Fill the pot two thirds with good quality potting soil with some extra sand and bone meal mixed in. Sand will ensure drainage and bone meal will serve as a slow release source of calcium and phosphorous that citrus plants need. Finger lime trees themselves are not too particular about soil fertility; they’re not bothered by poor soil in their natural habitat. However, the rootstocks they’re grafted on like rich soil to thrive.

    Find A Good Location

    This understory tree grows in dappled light in its subtropical home, but it does well in a sunny location, especially in cooler areas. Some shade in the afternoon may be appreciated in summer though. You can grow this tree indoors as long as it receives six hours of sunlight.

    Selecting The Varieties To Grow

    Selection of Australian Finger Lime trees may be limited by the availability of grafted trees locally. Several new hybrids have been developed in recent years, but not all plant nurseries have them in stock, and there may be restrictions on shipping.

    Color of the lime caviar is usually the main criteria for selection, although it may be just as delightful in any color. The hybrid ‘Blood Lime’ has bright red flesh, while ‘Rainforest Pearl’ is a pink-fleshed variety. ‘Durham’s Emerald’ bears black fruit that has bright green flesh. ‘Judy’s Everbearing‘ has clear flesh and bears a few fruit round the year. ‘Alstonville’ is a heavy producer with pale green flesh.

    Some of the named varieties are protected by breeder rights registrations, so take care to buy your plants from reputed nurseries.

    Watering

    The Finger Lime tree likes soil that’s evenly moist, but not too wet for extended periods. It comes from an area that receives summer rain, so you should not allow the soil to dry out completely. Water it twice a week or when the top layer of soil is dry to touch. A layer of mulch might help keep the soil cool and moist.

    Avoid overwatering or waterlogging, as it may kill the plant. A pebble tray may be kept under the pot to increase humidity, but the pot itself should not be sitting in the water.

    Feeding

    Australian Finger Lime tree is not a heavy feeder, but it requires a small dose of nutrients once every 3 months. Top dressing with compost, seaweed extract or fish emulsion will help keep the soil rich and healthy as the growing tree uses up the soil nutrients. Diluted compost tea or worm tea may be used as a foliar spray for an extra boost.  

    Flowering & Fruit Set

    After your Finger Lime tree is well established, you may have to wait a while to get the fruits. Grafted trees start flowering in their second or third year because their rootstock comes from mature lime trees. Flowers typically appear in winter (which is June to August in Australia in the Southern hemisphere) and the flowering continues into spring. The fruits take 5 months to mature and become ready to pick by the end of summer.

    Once the tree starts flowering, feeding should be stopped until the fruits are 1 inch long. The fruits fill out and change color as they mature, indicating they’re ready to be harvested.

    Have your gardening gloves ready to handpick them from among the thorny branches and enjoy.

    Pin This To Save For Later

    How To Grow Finger Lime Trees (Caviar Lime) In Pots No Matter Where You Live

    Read Next: How To Grow Pineberries – The Strawberry That Tastes Like Pineapple

    The post How To Grow Finger Lime Trees In Pots No Matter Where You Live appeared first on Natural Living Ideas.

    This content was originally published here.

  • What is Advanced Oxidation Process (AOP) for Swimming Pool Sanitization?

    What is Advanced Oxidation Process (AOP) for Swimming Pool Sanitization?

    —AOP systems safely and effectively disinfect water without the typical chlorine aggravation

    With advanced oxidation process (AOP)—a remarkably powerful and efficient method for disinfecting swimming pools—you can have swim-ready water without the harsh effects of typical chlorine sanitizing treatments.

    This potent treatment safely neutralizes a wide range of contaminants in pool water—including some dangerous pathogens that traditional chlorine treatments cannot tackle.

    AOP systems have been used successfully for years in large commercial water-treatment facilities, including those that produce water we drink. Recently, this technology has been adapted for backyard pools, and the results are paying off for pool owners across the country.

    What is Advanced Oxidation Process?

    Used in tandem with a small amount of chlorine, AOP works by oxidizing both organic and inorganic matter that contaminate swimming environments.

    Oxidation may sound like a complicated scientific term. But it’s a basic process that occurs all the time in nature. Have you ever wondered why an apple turns brown after you peel it? That’s oxidation in action.

    In a nutshell, oxidation is the loss of electrons which causes a substance to break down. Chlorine—the most widely used pool sanitizer—also works through oxidation.

    How AOP works in swimming pools

    AOP delivers better results than off-the-shelf chlorine alone. For starters, it provides three times the oxidation potential as chlorine.

    It’s also more lethal than two other popular alternative water sanitizers: ozone—a triple-charged form of oxygen—and ultraviolet light (UV). Bottom line, you cannot find another pool sanitation tool that packs the same wallop as AOP!

    AOP systems produce ozone molecules and then zap them with UV rays inside an enclosed equipment chamber. This action produces elements known as hydroxyl radicals.

    Hydroxyl radicals may sound a little intimidating, but they are completely harmless to swimmers. Time for a quick science lesson: Hydroxyl radical ions form when an oxygen atom bonds with a hydrogen atom.

    While AOP devices produce hydroxyl radicals using technology, these elements also exist in nature. In fact, scientists often refer to hydroxyl radicals as a kind of “detergent” for the atmosphere because they help eliminate many airborne pollutants, including greenhouse gasses such as methane.  

    Why hydroxyl radicals attack contaminants

    Because hydroxyl radicals are unstable, they seek equilibrium. So as soon as they form, hydroxyl radicals seek out both organic and inorganic substances to combine with to help them stabilize.

    By attaching to the cells in other various substances, hydroxyl radicals disrupt the composition of those substances—causing them to break down. That’s what makes hydroxyl radicals so effective at removing contaminants

    Even better: They complete their work without any chemical after-effects. Here’s why: Once in the pool water, hydroxyl radicals oxidize all contaminants in the water in mere seconds. Then, they simply convert back to oxygen.

    This process makes hydroxyl radicals completely safe for pool users while providing fresher, healthier water than any other pool-disinfection weapon.

    How AOP devices work: Pairing ozone with

    ultraviolet light produces hydroxyl radicals.

    10 benefits of hydroxyl-based pool sanitation

    Growing numbers of pool owners are seeking alternatives to standard chlorine treatments—and the hassles and hazards they often cause.

    Driven by this demand—coupled with technological advances that have lowered the price tags on AOP systems—this technology is becoming increasingly popular in backyards around the country.

    Let’s look at the key reasons AOP systems are quickly becoming a favorite choice for maintaining clean, healthy water conditions.

    Unmatched cleaning power:

    AOP systems easily outperform other pool-water treatment methods, including chlorine, salt-chlorine generation, ozone, and ultraviolet light. AOP’s hydroxyl radicals destroy 99% of organic and inorganic contaminants in pool water.

    Hydroxyl radicals also prevent the formation of icky biofilm. Biofilm is an accumulation of slimy, bacterial colonies that sticks to areas of a pool such as the tile line and any stone surfaces. Hydroxyl radicals also inhibit growth of stubborn algae blooms as well.

    Greater water clarity:

    AOP technology remove the colloids—tiny particles from dissolved metals, gels, lotions, and other inorganic substances—that make the water look cloudy.

    It’s worth noting that your pool filter cannot remove all of these compounds. But AOP systems enable your filter to achieve what is typically impossible: AOP produces “micro-flocculation,” a process of aggregating tiny particles into clumps.

    Although these clumps are not visible to the human eye, they are big enough for your pool filter to trap and remove from the water. So, instead of a hazy pool, you get brilliant, sparkling water!

    Comprehensive disinfection:

    AOP’s hydroxyl radicals fully oxidize all kinds of organic contaminants. The range includes sweat, body oils, bacteria, viruses, human waste, and toxins such as pesticides.

    AOP also outperforms chlorine on some important fronts. Among the nasty bugs that chlorine cannot eliminate: E. coli, Giardia, Listeria, Salmonella, Legionella, Pseudomonas, and Cryptosporidium parvum (aka “Crypto”).

    However, AOP technology has the power to take down these chlorine-resistant microorganisms. For example, it goes after the Crypto parasite by destroying its cell walls. No other pool disinfectant currently in use is as effective in protecting against this serious health threat.

    Safer, gentler sanitization:

    AOP is lethal to unwanted microorganisms, but not to people and pets who enter the pool. It removes contaminants with no effect on swimmers.

    Its efficacy comes without producing toxic byproducts, making AOP much gentler than traditional chlorine treatments. Chlorine creates chloramines—harsh byproducts that wreak havoc for pool users with bleach-like odors, itchy eyes, dry skin, sore throats, parched rough hair, and faded swimsuits. Highly sensitive swimmers may even experience nausea or vomiting.

    Unlike chlorine, AOP does not produce these irritating byproducts and the rash of physical side effects that often accompany them. In fact, AOP destroys chloramines, removing some of the unwanted effects they cause.

    Faster performance:

    Within the first 24 to 48 hours of using AOP, hydroxyl radicals clean, sanitize, and micro-flocculate the water. They work in seconds to oxidize contaminants. Virtually instantaneously, hydroxyl radicals deal a blow to pathogens that chlorine alone would take hours to kill.

    Lower chemical demand:

    AOP pool systems do not eliminate the need for chlorine and other chemicals. However, they dramatically reduce the requirements for them.

    In addition, AOP helps boost the overall effectiveness of the small amount of chemicals that are used.

    Easier on your pool:

    AOP systems work using a gentle, but effective process. By helping sanitize water without the usual chlorine levels, the odds decrease for damage to certain pool components and systems. The reason: With traditionally chlorinated pools, it’s easy for the water to fall out of balance.

    High chlorine levels lower the pH of the water, making it more acidic. Over time, water with low pH can lead to corrosion of metal piping and certain components of pool equipment. Serious water imbalances can also erode pool plaster.

    Better water quality:

    With lower chemical levels in your pool, AOP-treated water is easier on your eyes, skin, and lungs—making swimming and pool play safer and more enjoyable for everyone.

    Due to AOP’s micro flocculent action helping pool filters remove more contaminant particles—including certain metals—many AOP-pool owners say the water not only looks better, it even feels better to the touch.

    Environmentally safe:  

    After hydroxyl radicals oxidize organic and inorganic contaminants in the water, they quickly convert back to oxygen. No noxious byproducts are produced or left behind.

    This process makes AOP an eco-friendly technology. It disinfects pool water better than any other method without damaging the environment. You can feel good that any water that splashes out of the pool won’t harm nearby plants with caustic effects the way heavily chemical-laden water or saltwater-chlorinated water can.

    Overall value:

    AOP systems deliver maximum sanitation results, and for that, the units’ price tags certainly run more than a bottle of chlorine or bucket of tablets. Initially, this technology also costs more than saltwater, ozone, or combination UV/ozone systems.

    The cost for an AOP unit will ultimately depend on the size of your pool. In general, a quality AOP system for a typical pool averages between $700 and $1900 without installation.

    However, over the long term, AOP’s many advantages make it a very smart investment. For starters, consider the savings on money for chemicals. AOP requires only minimal chlorine: Fewer chemicals going into the pool translates to less money going out of your wallet.

    From a pool-ownership perspective, AOP produces immediate payoffs with water that looks great and provides healthier, more comfortable swimming.

    The technology ensures softer, crystal-clear water that’s beautiful to gaze at and that’s free of typical chlorine aggravation. For many pool owners, their families, and their pets, this more attractive, more enjoyable pool experience is hard to put any price on!

    Should you install an AOP system in your new or remodeled pool?

    The sanitation system is one of the most important components of maintaining your aquatic backyard resort. If you’re thinking about building a pool at your home or modernizing an existing one, you will certainly want to consider including an AOP unit in your equipment line up.

    Ultimately, your choice in sanitizing systems will come down to the features and benefits that are most important to you and your family: Easier to keep pool water properly balanced? Amount of chemicals required? Wiping out stubborn pathogens? Stunning water clarity? Silky feel of the water? Environmental impact? Comfort in the water? Overall, long-term value?

    All of these factors will play an important role in your decision. The fact remains that AOP represents the pinnacle in pool & spa disinfection—the superior technology on the market. Hydroxyl radicals sanitize quickly and safely, and they will give you polished, healthy sparking pool water like no other system can.

    This content was originally published here.

  • Alternatives to Toxic Detergents- SmartKlean, Soap Nuts and Biodegradable Soaps

    Alternatives to Toxic Detergents- SmartKlean, Soap Nuts and Biodegradable Soaps

    I definitely get dirty A LOT, whether it’s in the garden or just constantly spilling stuff on myself, but as you might have noticed in my photos and videos I also try to keep pretty clean. At the same time, I do my best to keep clean in a way that doesn’t pollute our home.

    This little thing is called a SmartKlean Laundry Ball and is a great alternative to detergents and soaps that pollute our waterway. The ball is filled with little clay balls, “active components derived from Earth minerals” and is good for 365 loads. It leaves no trace in our aquatic ecosystems like detergent does. It also reduces packaging waste and energy consumption from recycling bottles (which aren’t recycled as much as we’d like to think). Once you’re done with the ball the ceramics inside are even biodegradable.

    I have used it over the last 5 years and have had a great experience with it. Honestly, I always struggle with getting my clothes clean in washing machines and I don’t feel like my clothes always get clean. But that goes for whether I used detergents or the SmartKlean. Technology like washing machines and I just don’t work that well together!

    Another non-destructive alternative I use is soap nuts or soap berries. This is a berry shell that naturally contains a cleaning agent that works like detergent. They grow on the Sapindus mukorossi (Soap Berry) tree in the Himalayas. In my recent adventure to the Everglades I also found the lesser used North American species- Sapindus saponaria growing on an abandoned homestead.
    These are 100% natural and biodegradable. After using them you can compost them or just throw them in your yard to biodegrade. They are amazingly soapy. I got the ones I currently have from Life Without Plastic.

    You can also buy biodegradable, greywater friendly biodegradable soaps such as Dr. Bronner’s. These are made from ingredients that don’t harm plants, so the greywater can be used to water our plants. But you should not let this stuff into our waterways because it’s high in nutrients and causes problems such as algae blooms. Many health food stores have bulk sections where you can bring your own jar to fill up soap, saving the wasteful plastic bottle each time. There are also companies like Fillaree, that do mail order zero waste soap!

    The alternatives are out there my friends. We can save a lot of money, reduce our detrimental impacts on the earth and live healthier lives all at the same time!


    This content was originally published here.

  • 10 Beautiful Flowering Succulents – Garden Lovers Club

    10 Beautiful Flowering Succulents – Garden Lovers Club

    When it comes to my garden, I have always had an easy time growing any type of flowers that I wanted to grow. On the front side of my house, there is barely any shade, so I thought that a rock garden with a lot of flowering succulents would look great in the space. This is a type of plant that is not going to need a lot of care to grow, and most succulents are drought-resistant plants that will make gardening seem easy .  In this guide, we are going to take a look at 10 of the most beautiful flowering succulents that you can find on the market so that you can create your own creation.

    Christmas Cactus

    A Christmas Cactus is a tropical plant that can handle the heat. It is best in temperatures that are between 65 and 75 degrees Fahrenheit. It will grow in moderate sunlight, and it prefers a bit of humidity to thrive. This is a plant that will grow well in sandy soil, and the pink, purple, or red blooms can be seen around the holidays, which makes them a very popular plant to grow in zones nine through 11. If you are having trouble getting the plant to bloom, then it may need more daylight.

    Peanut Cactus

    A peanut cactus is a plant that features a bright orange bloom that will appear during the spring of the year. It is a plant that grows best in zones 10 through 12. This cactus has relatively shallow roots, which helps create thick fingers that are shaped a lot like peanuts. They can easily grow to be six inches tall, but they tend to grow out instead of up, and they can grow to be up to 12 inches wide. In most locations, they grow best in full sun, but hotter areas may require a bit of shade.

    Aloe

    This is a succulent that is great to grow in your home because the juice inside the leaves is great for cuts and burns. In addition, this can be a very beautiful plant that can easily be grown in indirect light. It is a plant that is not going to need to be watered a lot, so to make sure that your plant does not sit in water, you should only give the plant fresh water every three weeks. It will grow best in zones nine through 11.

    Orchid Cactus

    Growing best in zones 10 and 11, this is a hardy plant that can grow from five to 10 inches across easily. This is a plant that does not bloom very often; in fact, it typically blooms during the night time just a few times a year. You will notice that this is a plant that will not create blooms during the first two years of growth. Typically, this is a plant that will produce flowers on its own, but give them more light, give them potassium fertilizer, and keep the plant in the same location to grow.

    Moon Cactus

    This is a plant that is recognizable by the pink, orange, and yellow blooms that it produces. This is also a cactus that does not require a lot of water. In fact, you will always want to be careful when you are giving the plant a drink so that it does not become overly saturated and soggy. Moon Cactus are quite unique; they are typically a single stalk with a bright bulb on the top of their head.  This is also another plant that you will find in zones 10 and 11. The leaves of this succulent are rather gorgeous, and it requires minimal care to grow. I have found that this group grows best with a mixture that is slightly more peat moss than perlite. Do not allow the plant to sit in the water because this can only cause problems for the plant. If you have pets, this is a plant that may be unsafe to grow around them.

    Crassula (Jade Plant)

    This is another tropical succulent that is going to produce beautiful pink, purple, and white blooms. It will grow best in zones nine through 11, and with the right care, it can grow to be four to six feet tall. It is a drought-tolerant plant that does not require a lot of water, but it does need to have full sun to really thrive. Another feature that makes this a very pretty plant to have around is the blue-green foliage that has tips that change in color to maroon or burgundy.

    Crown of Thorns

    Seen most often in zones nine through 11, this is a lovely plant that produces bright red blooms from early spring until late summer. It prefers to grow in temperatures that are between 60 and 96 degrees Fahrenheit. This is a succulent that will do best with a lot of indirect sunlight. It also requires very little water, so make sure that the top of the soil is dry before you give it more.

    Carrion Cactus

    Also known as a starfish flower, this is a cactus that has large five-point blooms. The flower itself may look nice, but it actually does not smell all that pleasant. Typically, the flowers are red in color, but they can be more of a brown on some plants. This is a plant that grows best in well-drained soil, and unlike most succulents on this list, it will need to have moist soil to grow.

    Opuntia (Prickly Pear Succulent)

    This is a succulent that is known to grow well in warm, dry climates. It is often found in zones nine through 11, but some varieties can be found in a wider spread. They grow best in full sun and well-drained soil. In addition, during the months of June and July, you will be able to see red, yellow, and purple blooms. The fruit can also be a variety of colors, which include green, red, orange, and yellow.

    Popular Garden Ideas

    This content was originally published here.

  • 5 Surprising Ways To Use Pine Cones In The Garden

    5 Surprising Ways To Use Pine Cones In The Garden

    5 Surprising Ways To Use Pine Cones In The Garden

    Found en mass on the forest floor, pine cones are abundant and easy to source no matter the time of year. These little woody things come in all sorts of shapes and sizes, depending on the conifer tree they dropped from, and can be put to good use as a material for a variety of craft projects.

    If you have a few evergreen trees in your yard, pine cones may seem like more of a nuisance than a gift. But pine cones are a free renewable resource with plenty of applications in the garden. Collecting them provides yet another ingenious way to garden for free.

    1. Make Pine Cone Mulch

    Spreading a layer of mulch over your garden beds helps the soil retain moisture, suppresses weeds, keeps the ground cool, and makes an attractive cover for the bare earth. Using organic mulches also means that, as it breaks down and decomposes, nutrients will be released to improve soil fertility.

    While wood chips, coconut husks, straw, and shredded bark are some of the mulch options available for purchase, stocking up on mulch can easily cost hundreds of dollars depending on the square footage of the area. Mulch should be applied at a depth of 2 to 3 inches, and needs to be reapplied every year or two.

    A no cost alternative to bagged mulch is to use the waste your yard generates each year. Backyards are often abundant in several mulch worthy materials, like grass clippings, leaf mold, , pine needles, and pine cones.

    In the natural environment, pine cones are tasked with distributing the conifer tree’s seeds; they open their scales to release the seeds during dry periods and close up again when wet. They can persist on the ground for years to repeat their reproductive cycle again and again. In the garden, this means they can be used as incredibly long lasting mulch that will take ages to decompose. They are also naturally resistant to mold and fungus.

    You can mulch with pine cones by keeping them whole. Or you can break them up by processing them with a wood chipper or by running them over with a lawnmower. Another method is to simply smack them repeatedly with the back end a shovel – inelegant but very effective.

    Because pine cones are somewhat acidic, use them around acid loving plants like blueberries and azaleas. Otherwise, you can sprinkle some baking soda on the ground as you apply the mulch to help neutralize soil pH.

    2. Add Pine Cones To Your Compost Pile

    Pine cones are also an excellent source of carbon (or “browns”) in the compost heap. They are primarily composed of ash, lignans, and tannins, and once fully broken down, will add these beneficial elements to your finished hummus.

    Although its slow degradation is great for mulch, in the compost pile you will want to hasten the process by chopping them into smaller pieces first. The smaller the better so for the quickest composting results, use a chipper or shredder to create a very fine, sawdust like consistency before adding it to the pile.

    3. Build A Ladybug Hotel

    Like a world in miniature, the garden is home to a thriving population of insects. By encouraging certain beneficial bugs to call your garden plot home, you will be enlisting the help of numerous workers that will tirelessly pollinate your plants, decompose dead plant tissues, and prey on garden pests. And by simply letting nature do its work, you can avoid the use of pesticides and other harmful chemicals altogether.

    One of the good guys, ladybugs are among the most sought-after garden residents. Don’t let their cuteness fool you, they are voracious hunters that will devour 50 or more aphids, mites, white flies, or scale insects per day.

    Building a bug hotel is a great way to encourage ladybugs and other insects to stick around. While there are all sorts of scavenged materials you can use to give them a place to nest and hibernate – such as hollow reeds, branches, leaves, bark, and holes drilled in logs – pine cones are an excellent place for lady bugs to settle overwinter.

    You can provide them a pine cone room in a multi insect abode. For a quick, ladybug dedicated fix, this DIY requires only chicken wire or netting, twine, and several pine cones; hang it near your garden in a sheltered area that is protected from heavy rain. Another option is to install a wall mounted planter (like this) and fill it with pine cones.

    4. Craft A Pine Cone Bird Feeder

    Craft A Pine Cone Bird Feeder

    Filling your backyard with activity and song, birds are not only pleasurable to watch, they also provide free pest control. Birds feed on caterpillars, grubs, mosquitoes, and beetles, and will often consume the seeds of weeds and other unwanted plants in the garden.

    You can make your garden an attractive place for birds to hunt and raise their young by growing your own birdseed. And an easy way to ensure they get their fill during the cooler months is to make a pine cone bird feeder.

    Any pine cone will do but a large, round, and wide one will provide the best surface area. Remove a few of the pine cone’s scales to make some extra space for food. Slather the pine cone in peanut butter or suet and then roll it in your favorite birdseed mix. Tie it with twine or a decorative ribbon and hang from the bough of a tree.

    5. Use Pine Cones As A Container Filler

    Large, deep planters can take bag after bag of soil to fill to the top. Not only is it expensive, most plant roots won’t reach the bottom of the pot so it’s also quite unnecessary.

    While plastic bottles, rocks, and tin cans are some of the container filler options available to use, pine cones have a few advantages over these types of materials. Firstly, pine cones are light and won’t add extra weight to your pot if you need to move it. Second, pine cones are slow to decompose and will surely add bulk for the entire season. And lastly, when pine cones do break down, they add beneficial nutrients to the soil and won’t leach out chemicals like plastics or metals would.

    When using pine cones to fill your containers, place them so they take up about one third of the space at the bottom of the pot.

    Pin This To Save For Later

    5 Surprising Ways To Use Pine Cones In The Garden

    Read Next: 15 Beautiful Pine Cone Crafts To Make Stunning Home Decor

    The post 5 Surprising Ways To Use Pine Cones In The Garden appeared first on Natural Living Ideas.

    This content was originally published here.

  • Why Sunflowers Are So Green for the Garden – One Green PlanetOne Green Planet

    Why Sunflowers Are So Green for the Garden – One Green PlanetOne Green Planet

    Sunflowers are not the typical crop that newbie gardeners think of growing, but this might be a mistake. The fact of the matter is that sunflowers are really easy to care for, and they can also lend a notable hand in the garden. Then, of course, there are all those sunflower seeds that make a delicious snack and quickly nullify the need to ever buy sunflower seeds (to sow) again.

    Since long before chemical fertilizers and GMO seeds, sunflowers have been a part of agriculture, dating back to at least 3000 BC, and they have been used for all sorts of handy stuff: seeds, oil, medicine, fiber, as well as beauty. Amazingly, sunflowers can sprout up to six feet high in a matter of three months, and seeds are usually harvestable around the same time, possibly extending on to four months.

    Besides being a valuable crop in and of themselves, the Helianthus — or sunflower — family is also used to help out the garden as a whole.

    Easy-Growing

    Any time a productive plant requires little to no inputs and virtually no care, it’s got to make it into the garden somehow. Sunflowers are prairie plants, which has made them very tough, not greatly affected by pests or by drought. They grow in just about any type of soil, and they can survive in both acidic and mildly alkaline pH levels. Once they get themselves established, they are likely there for the long haul, so gardeners won’t be using resources to get (and keep) those sunflowers up. Now that is green gardening.

    Just remember not to completely block the sun from the other crops. Putting tall sunflowers on the south side of the garden might not be a great idea. Otherwise, planting them about six inches apart will supply a living fence around the garden or even between beds.

    Free Garden Stake

    Another popular sunflower function is acting as a free garden stake for climbing vines, such as cucumbers and tomatoes. Unfortunately, sunflowers and green beans — the original garden stake dweller — are known to not be so great of friends. Regardless, sunflowers, like corn, are tall and spindly, so they make great garden stakes for other plants, and they don’t require any extra material. In fact, they can just be composted after the harvest. On the flip side, lettuce likes to grow in the shade of the towering sunflowers.

    Beloved (and recently departed) permaculturist, Toby Hemenway, authored a great bookm— Gaia’s Garden — in which he recommended using Helianthus maximaliani, or Maximilian sunflower, as a deer repellent. Otherwise, despite being beautiful animals and welcomed by many into their yards, deer will gladly ransack a garden and strip it down to nearly nothing.

    Pest Distraction

    More than a repellent, sunflowers are often grown for the quality of distracting pests, specifically aphids, away from other, more tender crops, like tomatoes. Ants, which feed on the aphid-produced honeydew, will encourage and protect aphid colonies to live on sunflowers. It’s one of nature’s outstanding things. No pesticides required.

    Sunflowers are also a new green option because they are particularly attractive to bees and other beneficial, pollen-collecting insects and hummingbirds. As most of us are aware by now, the bees need all the help they can get, so if planting sunflowers did nothing more than that, it’d be worth it. Of course, we know that they do much, much more.

    Soil Cleansing

    Sunflowers are noted as being allelopathic, which means that they emit a chemical that prevents other plants from propagating nearby. In the garden, potatoes and beans are particularly susceptible, so be aware of that. But, this is what makes them so good for garden borders, as they’ll block weeds from growing in. Sunflowers also aid phytoremediation, which is a process that cleans contaminated soils. It’s even been used as an effective soil cleaner in really damaged sites like Chernobyl and post-Katrina New Orleans.

    Of course, many people grow sunflowers for the simple fact that they are stunning, massive flowers that brighten up the scene. Whatever your reason, get them in the garden after the last spring frost and expect to harvest into the fall. Lots of people, especially in areas with long frost-free seasons, will plant a new crop every two weeks to have continuous blooms in the fall. Ain’t it grand when being green just works out so well.

    For more Life, Animal, Vegan Food, Health, and Recipe content published daily, don’t forget to subscribe to the One Green Planet Newsletter!

    Being publicly-funded gives us a greater chance to continue providing you with high quality content. Please support us!

    This content was originally published here.

  • Need a backyard Guest House?

    Need a backyard Guest House?

    Lillevilla Escape | 113 SQF Allwood Kit Cabin

    What a fun idea!  This could help you in so many ways with guests or extra family.  Have a little property and it needs a house?  Why not?  This is a great way to build a little cabin and afford it!  Add a chemical toilet. Low cost and takes up little space. A corner curtain can provide privacy.


    Inside Floor Area: 113 Sqf – 9’1″ deep x 12’5″ wide

    Wall thickness: 1-3/4″ (44 mm) – Nordic Spruce Dual Tongue Windblock pattern

    Ridge Height: 8′ 3″ | Wall height 6’5″

    Door: 33.5″ x 69.7″ | Window: 46.9″ x 34.2″

    Minimum site footprint 13’1″ x 9’8″ – Weight 3200 lbs

    There are many to choose from!  Click here to see!
    There are many to choose from! Click here to see!

  • How to Build a Straw Bale Garden – Modern Farmer

    How to Build a Straw Bale Garden – Modern Farmer

    Faced with the expense (OK, and effort) of building raised beds, I decided instead to go cheap and easy: a straw bale garden. So I called up Joel Karsten, author of Straw Bale Gardens, and lead authority on all things straw.

    Karsten argues that straw is an ideal “container” for growing vegetables. “The hollow tubes are designed by Mother Nature to suck up and hold moisture,” he told me. And as the insides of the bales decompose, they provide a rich medium for vegetable growth.

    You can put together a straw bale garden right on your lawn, your driveway (oh yes, your neighbors will love you) or anywhere that gets at least six to eight hours of sun. It’s especially good for growers who live in northern climes with shorter growing seasons – the bales heat up much quicker than soil, stimulating early-season root growth.

    Here’s the method that has made Karsten the go-to guru for straw bale gardening:

    1. Source your straw

    You can toss the dice like I did and purchase straw bales from your local garden center, but it’s best to source them direct from the farm. If you want to garden organically, the person at the garden center won’t likely know how the straw was grown. To help connect farmers with growers, Karsten has set up a user-generated marketplace, but it’s still too small to be useful to most gardeners. Remember, straw is easiest to come by in the fall. If you arrange your straw bale garden before the winter, you’ll be all set to plant when springtime comes.

    2. Position your bales

    Before you set up your bales, lay down landscape fabric to prevent weeds from growing up through the bales. Arrange the bales side by side in rows, with their cut sides up. The strings that bind the bales should run across the sides, not across the planting surface. The strings will help keep the shape of the bales as they start to soften and decompose.

    3. Condition the bales

    Two weeks before you plant, you have to get the bales cooking. This means wetting and fertilizing the bales for roughly 10 days to start composting the inner straw. For the first six days, put down 3 cups of organic fertilizer per bale every other day, and water the bales to push the fertilizer down and thoroughly saturate the straw. On the off days, simply water the bales. (Tip: try to ignore the neighbors staring suspiciously from their windows.) Days 7 through 9, lay down 1.5 cups of organic fertilizer each day and water. Day 10 put down 3 cups with phosphorus and potassium (bone or fish meal mixed with 50% wood ash works like a charm).

    If you stick your finger into your bales, they’ll be hot and moist. You’ll start to see some “peppering” – black soil-like clumps that signal the beginning of the composting that will continue through the growing season. If mushrooms sprout up, rejoice – they won’t harm your plants; it means the straw is decomposing as it should.

    4. Build a trellis and greenhouse in one

    One of the coolest things about straw bale gardening is that it combines the best of container gardening with vertical gardening. Karsten recommends erecting seven-foot-tall posts at the end of each row of bales, and running wire between them at intervals of 10 inches from the tops of the bales. As your seeds sprout, you can use the bottom wire to drape a plastic tarp to create an instant greenhouse for those chilly early-season nights. And as the plants begin to grow, the wire works like a vertical trellis, supporting your cucumbers, squash and assorted viney vegetables.

    5. Time to plant

    If you’re planting seedlings, use your trowel to separate the straw in the shape of a hole and add some sterile planting mix to help cover the exposed roots. If you’re planting seeds, then cover the bales with a one to two-inch layer of planting mix and sew into this seedbed. As the seeds germinate, they’ll grow roots down into the bale itself. While you’re at it, plant some annual flowers into the sides of the bales, or some herbs – it’s otherwise underutilized growing space, and will make the garden a whole lot lovelier.

    6. Look, ma – no weeding

    If you lay a soaker hose over your bales, you’ve pretty much eliminated all your work until harvest. That’s because your “soil” doesn’t contain weed seeds. There’s one caveat, though – if you didn’t get your straw from a farmer (guilty as charged), there’s a chance your straw (or, worse, hay that was sold as straw) contains its own seed. If your bales start to sprout what looks like grass, you can beat back the Chia pet effect by washing the sprouts with diluted vinegar. If you don’t mind the look though, the grass shouldn’t harm your plants, and will likely die off from the heat produced by the bale’s decomposition.

    7. The harvest after the harvest

    When the harvest season ends, the bales will be soft, saggy and gray – but that’s exactly what you want. Because when you pile the straw together and leave it to compost over winter, you’ll have a mound of beautiful compost to fill all your pots and planters in the spring.

    Nicole Cotroneo Jolly (@nicolecotroneo) is a journalist, filmmaker, and founder of How Does it Grow?a series of food education videos that trace our food back from the fork to the field.

    This content was originally published here.

  • Choice’s four tips for stacking your dishwasher for a cleaner wash  | Daily Mail Online

    Choice’s four tips for stacking your dishwasher for a cleaner wash  | Daily Mail Online

    While everyone has a different technique for stacking the dishwasher, there are a few foolproof tips that guarantee sparkling dishes every time.

    So to make things a little easier, consumer advocacy group Choice Australia has shared some of their best advice for stacking and achieving the best clean possible.

    From what materials to wash and where to place dirty pots to how to use dishwashing tablets, these are the best tips they had to offer.  

    While everyone has a different technique for stacking the dishwasher, there are a few foolproof tips that guarantee sparkling dishes every time 

    1. Why you should never place wood, aluminium or copper in the dishwasher

    While most things are safe to stack – including everything that has ‘dishwasher safe’ written on it – there are a few exceptions.

    You should never put anything made of wood in a dishwasher, namely chopping boards, rolling pins and wooden spoons because the material absorbs every odour and flavour circulating from other dirty dishes.  

    Good knives and fine china should also be avoided because the water pressure and corrosive detergent can blunt your knives and ruin the detailing on those previous pieces of crockery.

    Anything that contains a ‘reactive metal’ – which is prone to corroding over time – is also best washed by hand.

    That means anything with aluminium and copper – including non-stick pans – should be hand washed.

    While most things are safe to stack inside the appliance – including everything that has the words ‘dishwasher safe’ written on it – there are a few exceptions

    2. Why you don’t need to bother pre-washing dishes

    Your favourite dishwashing tablets should have enough power to remove all manner of surface stains without you having to thoroughly wash your plates beforehand, but you should scrape all food scraps in the bin before putting them in the dishwasher.

    This prevents clogging the filter, which will only make it harder for your dishwasher to do its job.

    Speaking of the filter, it should be cleaned once a week to stop unnecessary build-up.

    Speaking of the filter, it should be cleaned once a week to stop unnecessary build-up

    3. Why you should place the dirtiest dishes in the middle

    Placement is key for getting a cleaner wash every time.

    Plastics should go on the top shelf to reduce the risk of melting, as should glass to prevent it shattering.

    Because the spinning fan can sometimes miss the corners of the dishwasher it’s best to place very dirty pots and pans in the middle of the stackable shelves for maximum effectiveness.

    Also make sure all plates and bowls face downward to avoid dirty water sitting in it and don’t stack them right on top of each other. 

    Leaving a gap will ensure water and soap can get between the dishes to wash them.

    When the wash is complete open the dishwasher as soon as possible and pull out the trays. The heat from the wash will dry the dishes faster. 

    Because the spinning fan can sometimes miss the corners of the dishwasher it’s best to place very dirty pots and pans in the middle of the stackable shelves for maximum effectiveness

    4. Why you shouldn’t put some dishwashing tablets in the dispenser 

    If you’re using anything with the name ‘3-in-1’ or ‘multi tab’ in it then it’s actually more beneficial to put them at the bottom of your machine, not in the dispenser.

    They’re not designed to be placed there because they won’t be released in the same way a single brick tablet would.

    The 3-in-1 tablets have a section to them that are meant for the pre-wash stage but the dispenser doesn’t open until the main wash has begun, thus rendering 1/3 of the tablet null and void. 

    If you’re using anything with the name ‘3-in-1’ or ‘multi tab’ in it then it’s actually more beneficial to put them at the bottom of your machine, not in the dispenser

    Choice’s four tips for stacking your dishwasher for a cleaner wash 

    The views expressed in the contents above are those of our users and do not necessarily reflect the views of MailOnline.

    Add your comment

    What’s This?

    By posting your comment you agree to our house rules.

    We will automatically post your comment and a link to the news story to your Facebook timeline at the same time it is posted on MailOnline. To do this we will link your MailOnline account with your Facebook account. We’ll ask you to confirm this for your first post to Facebook.

    You can choose on each post whether you would like it to be posted to Facebook. Your details from Facebook will be used to provide you with tailored content, marketing and ads in line with our Privacy Policy.

    This content was originally published here.

  • 11 Herbs That Grow From Cuttings | Balcony Garden Web

    11 Herbs That Grow From Cuttings | Balcony Garden Web

    Here’re 11 Herbs that Grow from Cuttings, it’s an easy and less time-consuming method than seed propagation.

    You can save a lot of money by growing herbs from cuttings. And, don’t forget it’s an easy way to multiply your herbs and less time consuming as well.

    Growing Herbs from Cuttings

    There are three types of cuttings which are Softwood Cuttings, Semi-hardwood cuttings, and hardwood cuttings:

    Softwood cuttings are taken from the young and tender stem growth when they’re green, as the stem starts to change from green to brown and become hard and old, the cuttings that are taken at this time are known as hardwood cuttings.

    Usually, the success rate from softwood cuttings is higher than hardwood cuttings, which means you should prefer the cuttings from the new growth instead of old growth as they are most likely to grow roots.

    Take cuttings using a sharp tool; 
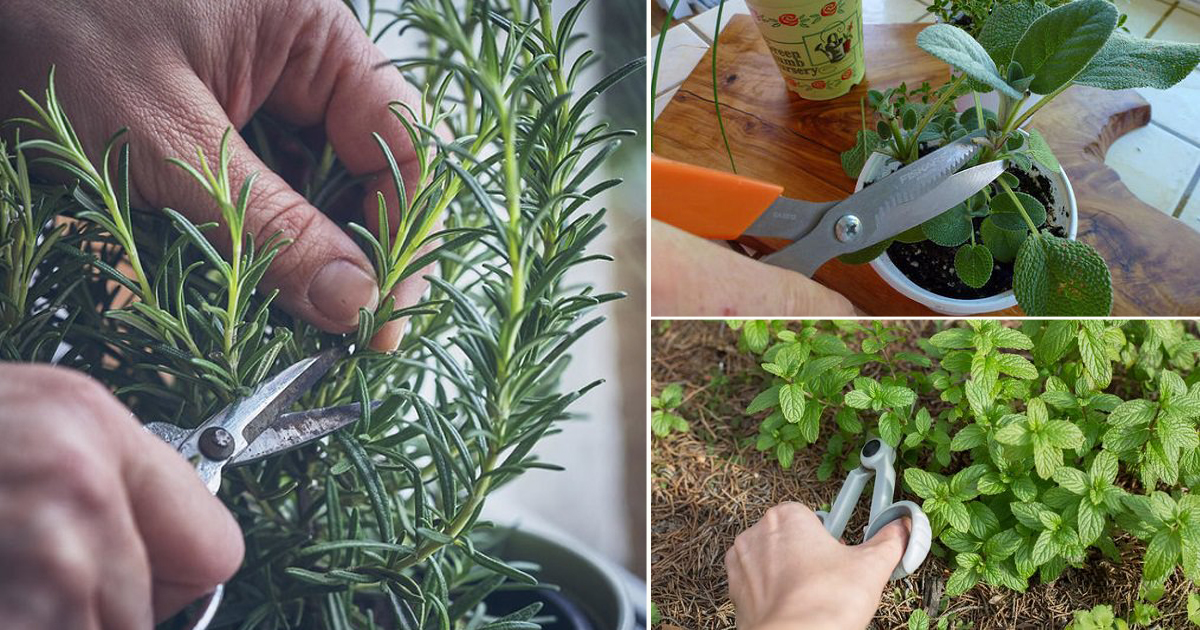
cuttings must be at least 3-6 inches long. Take the cuttings at an angle just below a leaf node. A leaf node is where a leaf is attached. Remove all the lower set of leaves from the cuttings except the top few, so that the energy could be focused only on the root generation.

    You can grow them in either soil or water. Soil is preferable as it provides the necessary nutrients for plants to grow. To increase the propagation rate, before planting, drop the node end of the cuttings into the water and then dip them in rooting hormone. Rooting hormone will stimulate the root growth. You can use a commercial rooting hormone or make your own at home. You can use honey or aspirin for this purpose, learn more about this here.

    1. Thyme

    This amazing herb has been used for thousands of years for medicinal and culinary uses. Cuttings should be taken at a node from the point where leaves grow, as roots are most responsive at this point. The cuttings should be planted in damp soil and away from the direct sun after removing lower leaves.

    2. Basil

    One of the best herbs that grow from cuttings. Propagating basil will keep the supply of this herb going year around. All you have to do is cleave a basil stem (about 4-5 inches long) just below the leaf node, and follow the steps we shared above. You can also place the basil cutting in the glass of water near the windowsill, so it gets sufficient sunlight and grow roots. Avoid taking cuttings from the flowering part.

    3. Sage

    With its refreshing mood fragrance and essential oils, sage is a must-have herb in your garden. Growing sage from cuttings is super easy: Take the cutting from a shoot approximately 6 cm below the node. Plant this cutting in moist soil and place it in a spot where it can receive morning sunlight. You can also grow cuttings in a glass of water to multiply your sage plants. Within two weeks roots will start to appear!

    4. Lavender

    The best time to grow lavender from cuttings is in the summer season as they root easily in this season. You will need Lavender plant, sharp knife, a small 10 cm pot, multi-purpose compost, Rooting hormone (liquid or powder), clear polythene bags to propagate lavender plants. Check the detailed step by step DIY available here.

    5. Rosemary

    Growing rosemary from seeds is tedious work, so it’s better to propagate it from cuttings. Snip off 3-6 inches non-flowering shoots, and remove all the lower leaves so that only 2-3 top leaves are left. Keep the cuttings in cold frame or any sheltered and shaded space until they root in the next few weeks.

    6. Oregano

    This herb requires very less attention and can be grown indoor or outdoor. Oregano thrives in a moderately warm climate and is a hardy perennial. To propagate, take a few inches long cuttings from a healthy oregano plant. It is better to take the cuttings from the young shoots as they are more likely to sprout roots. Remove the leaves from the bottom half. Plant it in the lightweight porous soil.

    7. Mint

    Mint is a very popular herb that can be used either fresh or in dried form in many dishes. Mint has one of the highest antioxidant properties compared to many other herbs. Growing mint from cuttings is as easy as growing it, in both the soil and water. Roots start to appear mostly within a week.

    8. Sweet Woodruff

    This herb has multiple uses and is most well known as an ingredient in May wine. It does not only have the culinary uses, but it also works as an excellent ground cover in the garden. It thrives in partial shade and shade, so should be planted under trees. Its fragrance resembles freshly-mown hay or vanilla. Once planted this herb thrives on its own if watered regularly. If you want to plant them at some other place, you can propagate this herb easily from cuttings.

    9. Bee Balm

    This herb has both culinary and medicinal uses. These plants bear bright flowers that attract butterflies and possess a minty fragrance which makes them ideal for bordering. The best time to propagate this herb by cuttings in late springs. Cut a 6-inch stem tip without flowers. Remove the leaves from the bottom half and dip the cutting in rooting hormone. Stick the cutting two inches deep in a small pot filled with well-aerated soil.

    10. Marjoram

    Marjoram is a versatile herb and has many uses in cooking and is also used in aromatherapy. This herb has many health benefits. Seed germination is slow, and it takes approximately 2 weeks to germinate. Propagating marjoram is an easy way to multiply this herb in a short period. Take cuttings from the tip of the stem which is not less than 3 inches in length. Leave 4-6 leaves from the top and remove all other leaves. You should plant cuttings in late summer or early springs. In a hot climate, do this in winters.

    11. Parlsey

    Growing parsley from cuttings is possible, but the success rate is low. For this, take 4-5 inches long stem with some leaves on top and place it an inch deep in the pot. Maintain the moisture and keep the cutting in a shady spot that receives indirect light, wait for a couple of weeks for the emergence of roots.

    This content was originally published here.