Category: Home & Garden

  • Xeriscaping: The Art and Science of Low Water Gardens

    Xeriscaping: The Art and Science of Low Water Gardens

    You may not have heard of xeriscaping before, but it’s probably something you see almost every day as it’s just a style of landscape design that requires little to no irrigation or maintenance. And while the concept of xeriscaping definitely came about because of people who wanted gorgeous outdoor spaces, but lived in drought-affected areas, in fact, it really makes sense for almost all landscapes. Read on to find out why a low water garden might be the right choice for you.

    Why Should I Consider Installing a Low Water Garden?

    Over 50 percent of the water used by residential Americans is used watering lawns and keeping landscapes alive. Even if you don’t live in a place where water conservation is mandatory, you can still help save our most valuable resource by switching to a low water garden.

    Veronica Boyer, architect designer and owner of EcoDesignSD, says your plants that are native to where you live will also thrive and look a lot better in your garden. “It’s not necessarily about a drought,” she says. “It’s about being low maintenance. It’s hard for a plant to adapt to an environment it’s not from. You can’t plant succulents in the mountains or tropical flowers in the dessert and expect them to do well. It’s a matter of placing the right plant in the right place.”

    Having a low water garden also helps reduce pollution and negative effects on the environment, as you don’t need gas lawn mowers or chemical fertilizers and pesticides and native plants may also foster a healthy wildlife habitat.

    But I Really Love My Lawn

    Yes, it’s true that with low water landscapes, the lawn is usually the first thing to go. But it doesn’t mean you don’t have to have a lawn at all. Boyer recommends buffalograss, which can survive with very little fertilizer, water, or mowing and recovers well after not being irrigated. “You can also use artificial turf,” she says. “The new ones are good; they last a long time and look very real.”

    Will I Have to Change My Irrigation System?

    Since your high-maintenance lawn is gone, Boyer suggests people making this change get rid of their sprinkler system in favor of a drip irrigation system. “That way you aren’t wasting water and watering areas that don’t need it,” she says. A drip irrigation system delivers water directly to the base of the plant, so there’s less evaporation, pooling, and erosion.

    Do I Have to Get Rid of Everything in My Garden?

    The point of a low water garden is to improve the environment, not create more destruction, so Boyer says she tries to keep as much as she can and work with what’s there. “I try to save and reuse materials and be conscious about what’s being thrown away and what’s being kept.” Yes, some things may have to go, but it may also just be a matter of moving a plant or tree to a location in your yard or garden where it will have a better chance of succeeding.

    You may also want to look at things you don’t like in your garden anymore and see if there’s a way they can be repurposed. “I had a client who had a fountain they didn’t use anymore,” Boyer says. “They were sick of cleaning it and taking care of it. So we turned it into a succulent planter and now it’s a focal point in their garden. They love it because it’s not a lot of work and it looks beautiful.”

    Tell Me More About This “Not a Lot of Work” Thing

    One of the biggest benefits of xeriscaping is that it’s low maintenance. “You’re going to save a lot of time,” Boyer says. “If you have plants that are native, you’re not going to have to work so hard for those plants to survive and look beautiful. You can go out of town for three weeks and not worry about your garden. And you’ll save money because you won’t have to keep putting money in to ensure the plant survives.”

    Why Should I Hire a Professional to Help Me Design My Low Water Garden or Landscape?

    It’s always important to talk to the right people to help you achieve something you may not know a lot about as you’ll just get better quality work. Boyer points out that if you don’t know what you’re doing, you may also end up spending a lot more money. “I think it’s important to hire a professional for anything you’re going to do if you’re not an expert,” she says. But in this case, it’s also about finding someone who can help with the planning and design, soil analysis, plant selection, irrigation, and show you how to maintain it all. “Their advice and help will make your life a lot easier,” she says. An expert will also help you establish a timeline depending on how big your outdoor space is and what you want to change and will ensure you stick to your budget.

    Remember, a xeriscape garden doesn’t mean your garden has to be barren or lacking color. A professional will help ensure that it’s the exact opposite and full of gorgeous native plants that will fit your aesthetic and thrive. And best of all, it will be easier on you and better for the environment.

    Veronica Boyer is an architect designer and owner of EcoDesignSD in San Diego. You can also find her on Thumbtack.

    This content was originally published here.

  • Out-of-Ground Swimming Pools: Custom Concrete Construction

    Out-of-Ground Swimming Pools: Custom Concrete Construction

    —How raised gunite pools beautifully triumph over building challenges

    One reason to build a raised, out-of-ground concrete swimming pool (gunite or shotcrete) is for style: The configuration achieves a distinctive, multidimensional aesthetic and delivers an original backyard design. 

    Another reason is functionality. Some homeowners opt for an elevated, “on-ground” pool design for a family member’s physical mobility needs. The design of some raised pools even yields safety and maintenance benefits.

    However, the most common purpose for using an out-of-ground pool design is to overcome a backyard condition, such as a slope or hard soil, which makes it a virtual construction necessity.

    Regardless of the reason behind the decision to build all or partially out of the ground, the outcome can be eye-pleasing and cost-effective. You can view some examples of these semi-on-ground pool designs to see how their configuration achieves results that are both beautiful and functional!

    Out-of-ground pool construction: overcoming—and capitalizing on—backyard obstacles

    Depending on factors in your outdoor property, your pool builder may suggest a plan for a concrete pool that’s positioned several inches to several feet up out of the soil.

    A number of special considerations impacting construction can make a full or partial above-the-ground pool a smart solution for a new concrete pool.

    However, the three most frequent ones come in the form of slopes, hard or rocky soil, or underground water sources.

    Sloped backyards

    The most common reason for an elevated design is a property with a slope. In most cases, the house sits at the peak or higher up, and the backyard slopes downward away from the home.

    One way to tackle a hilly plot of land is to use its uneven grade to your advantage. On the slope’s high end, it makes sense to build the pool level with the ground, and at the slope’s lower end, build that portion of the pool above or out of the ground.

    Both homeowners and contractors usually prefer this “elevated” approach to the alternative solutions for a sloped yard. These involve leveling the area for the pool using a costly, multi-phase process.

    In a nutshell, it involves building one large or two small solid retaining walls, usually in concrete or stone. Then, your contractor must haul in many yards of fill dirt to the job site and distribute it as needed to bring all areas up to the desired grade.

    Finally, crews need to heavily compact every bit of fill dirt throughout the yard. For many sloped yards, such a massive undertaking is both pricey and impractical. Worse yet, retaining walls may block all or part of a scenic view.

    By building one side of your pool out of the ground, you may not only save money and possibly preserve a scenic view, but come out ahead with a more interesting, more dramatic pool. In fact, a sloped yard often makes it easier to build an infinity pool design that so many homeowners love.

    Problem soil and “hard digs”

    Another reason for building a concrete pool above the earth is due to what lies below it. Rocks, hardpan, and caliche pose serious excavation challenges that require special equipment and tactics to overcome.

    Rock plagues a few geographic areas around the United States. When you can’t dig more than a few inches past the topsoil without hitting rock, excavation comes to a standstill without special machinery and tactics.

    Elsewhere in the country, excavation crews may encounter hardpan. It’s a kind of tough, clay-like soil that’s so tightly compacted its consistency resembles concrete.

    In desert regions, such as parts of Arizona and Nevada, the soil enemy is caliche. Sometimes called “nature’s cement,” caliche contains heavy deposits of calcium carbonate that bind tightly to other elements in the soil. The resulting rock-hard earth is notorious for making regular excavation a non-starter.

    To save time and money associated with bringing in specialty excavation equipment and hiring crews to jackhammer through a backyard that’s filled with rock or rock-hard soil, consider an elevated pool.

    Your contractor can excavate a few inches to a few feet through the soft topsoil, and then build a design that’s partially under the ground and partially above the ground.

    Along with being a practical solution to a “hard dig,” a custom elevated pool will produce a visually intriguing final design.

    Underground water sources

    Do you have a pond, lake, or river near your house? Are you by the ocean or a bay? Is your lot located above the area’s water table—as indicated by frequent patches of wet or damp ground?

    Another prime candidate for an out-of-ground concrete pool is an excavation site vulnerable to water from underground sources. To build a typical inground pool, contractors need to remove earth and create a dry, stable hole for the concrete shell. Water gets in the way.

    So, before starting regular excavation for a pool, a professional builder will create a small test hole. If a water table is already present two or three feet below the surface, full excavation may be tricky—and costly.

    Here’s why: Your contractor may have to bring in pumps and continuously run them to remove water from the pool hole while completing all of the other construction phases.

    To enhance pool-shell stability in high-water-table areas, your builder may also add a special layer of pea gravel in the bed of the excavated hole. Installation of permanent hydrostatic relief valves may be needed as well.

    These kinds of additional steps, materials, and equipment make construction more time-consuming and will increase anyone’s overall pool budget.

    But here’s the good news: You can negate the time and budget required to deal with an underground water table by opting for an elevated, up ground pool. Its configuration circumvents most issues of water infiltration, and it still gives you all of the choices of beautiful features of a concrete pool design.

    Pool design: taking style and functionality to new heights

    Some homeowners want a total out-of-ground concrete pool strictly for its unique good looks.

    Sometimes, the idea comes from a creative pool builder who presents this atypical configuration to clients who ask for something “original” or “different from all of the neighbors’ pools.”

    In other cases, homeowners latch onto this out-of-the-ordinary concept from seeing an elevated pool in a magazine or on a trip. In fact, it’s not uncommon for vacationers to return from overseas—whether Caribbean resorts or European cities—where they see unique concrete pools built out of the ground. Upon coming home, they want to replicate the look in their own backyard.

    Some people like the elevated design because they want to evoke the image of a large public fountain or pool-fountain they see at a park or in front of a museum. While they prefer the elegant fountain-inspired style, they still want a swimming pool in which the family can play and exercise.

    In addition to the great appearance of a raised concrete pool, it may offer some unexpected functionality. If your pool is even just a foot above ground level, an added benefit is that the wall becomes a convenient place to sit and socialize near the water.

    An on-ground pool also offers something of a safety benefit. While you should never leave a small child unattended near a pool, a fully elevated pool with raised walls around the full perimeter creates a barrier to wayward toddlers.

    In some cases, you may gain a leg up on pool maintenance as well. Pool walls that extend over the ground may hinder windblown debris from entering the water. In sandy beach or desert areas and landscaped areas with lots of fallen dead leaves, this vertical buffer can be especially helpful.

    Best of all, your builder can tailor a raised pool with the same range of decorative and functional features—from tanning ledges to graceful laminar water features—as a typical inground concrete pool.

    You may have your eye on a particular elevated design, or your backyard may pose conditions that call for some variation of an elevated pool. Whatever the motivation, the result can be an attractive, functional, out-of-the-ordinary aquatic playground.

    This content was originally published here.

  • Bonsai Master Masahiko Kimura Takes The Craft To A Whole New Level By Creating Gravity-Defying Mini Forests

    Bonsai Master Masahiko Kimura Takes The Craft To A Whole New Level By Creating Gravity-Defying Mini Forests

    Masahiko Kimura, not to be confused with the famous Japanese judoka of the same name, is a world-renowned bonsai master. Born in Saitama, Japan on March 31, 1940, his exceptional sculpting and styling technique later gave him the title “Magical Technician of Kindai Shuppan”. He started his career as a bonsai artist at the age of 15. It all began when he served as an apprentice to a bonsai master named Motosuke Hamano in Toju-en Bonsai Garden. After eleven years of working under Hamano, he decided to pursue the craft on his own. Since then, he has created many masterpieces that are considered the best in the world. But his latest creation, the Hinoki forest that features gravity-defying mini forest, is his most stunning piece so far.

    Bonsai (Japanese term for planting in a container), is an art form involving cultivation techniques to yield small trees that mimic the scale and shape of full size trees. The Japanese tradition of producing artificially dwarfed trees dates back over a thousand years. And is still a popular horticulture technique up to this day, not only Japan but also in many different parts of the world. For centuries, bonsai artists have strictly adhered to the conventional rules of traditional bonsai making. Masahiko Kimura, on the other hand, chose to create his own path by creating his own style and design.

    His unconventional bonsai creations have stirred controversy at first. Deemed by some traditionalists as a non-conforming artist, Kimura continued to break the traditional rules of bonsai making. Typically, the art involves cultivating a single tree or shrub planted on a container. Instead of planting just one miniaturized tree, Kimura brilliantly created a mini-forest sprouting from a slanted deadwood. He has produced and sold several versions of the Hinoki Forest. But the original version, which he created more than 20 years ago, still sits proudly in his garden. His garden is located in Omiya, Japan and is open to the public upon request.

    Take a virtual tour to the bonsai garden of Masahiko Kimura in Omiya, Japan

    The exceptional bonsai techniques of Masahiko Kimura have enthralled many bonsai artists from all around the world. In order to share his unique cultivation techniques, he offered demonstrations and workshops within and outside Japan. His works have been featured in various major publications around the globe. Since 1988, he has been garnering prestigious awards and has gained a number of apprentices coming from different countries. His students include Marco Invernizzi, Ryan Neil, Salvatore Liporace, Marc Noelanders, and Ernie Kuo who all later became bonsai masters in their own rights.

    Learn more about the world-renowned bonsai master in this 2016 interview

    This content was originally published here.

  • How to Care for Orchids

    How to Care for Orchids

    How to Care for Orchids

    Orchids are no more difficult to care for than ordinary houseplants. They require slightly different watering and fertilizing techniques, but with this easy guide you’ll be growing beautiful orchids in your home in no time. Bonus: We name the easiest orchid varieties to care for to guarantee success.

    Oops, we’re sorry. Something went wrong. Please try again later.

    Oops, we’re sorry. Something went wrong. Please try again later.

    Share your take on this idea!
    Upload your photo here.
    CLOSE

    Orchids are a large, diverse group of plants, and not all of them are difficult. Some are quite easy. Gain confidence with these gorgeous plants with the ones that are easiest to succeed with!

    How to Water Orchids

    Overwatering is a common cause for dead orchids. People typically ask about a plant’s water needs by inquiring how often they should water, and it’s this “how often” mindset that is a big part of the problem. How often you should water a plant depends on how much water it uses, which is a function of humidity, light, air movement, and what its roots are growing in. Watering by the calendar rather than a plant’s needs is a recipe for failure.

    So the short answer to the question of when to water most orchids, including Phalaenopsis and Cattleya, is: Just before it goes dry. How often is that? In practice, it can vary from every few days to every couple of weeks. It depends on the orchid and on the conditions in your home. One of those conditions — an important one — is the medium the orchid is growing in.

    The best way to judge moisture is the old-fashioned way — stick your finger in the planting medium. Pull it out, then rub your fingers together. You can easily feel if any moisture is present. If you don’t feel any, it’s time to water. Eventually, you’ll develop a sense of how often to water, and how conditions (seasonal changes, for example) affect frequency. You’ll also develop a “feel” for how heavy the pot is when the planting medium is dry, another way to gauge moisture levels.

    Editor’s Tip: A few suppliers (Charley’s Greenhouse, for example) sell clear plastic pots. When moss or bark — the best planting media for orchids — is moist, you’ll see the condensation on the inside of the pot. When it’s dry, you won’t, and you’ll know it’s time to water again.

    Watering is no more complicated than pouring water into the potting medium and letting the excess drain through the bottom. I’ve noticed that some orchids available in stores are in pots with no drainage holes. That makes it far more difficult to water properly, so I’d suggest repotting in a different container (or drilling holes, if you have the tools).

    Why Potting Mix Is Important

    It’s impossible to properly discuss watering without considering rooting media. Orchids are commonly potted in one of two media: moss or bark. Both are perfectly good materials, but they require somewhat different care. Moss acts like a sponge, and it takes a lot longer to dry out. Thus, for orchids like Phalaenopsis and Cattleya that need to dry out thoroughly before watering, moss requires a longer wait before watering and is less forgiving of too-frequent watering. Bark, which holds little water, poses less risk for these orchids. The rule of thumb for these orchids is: Water the day before the medium is completely dry.

    Lady slipper and nun’s orchids enjoy conditions on the moist side and they’ll do better if you don’t let them go completely dry. Moss is a good choice for them, supplying adequate water for longer intervals between watering. Can these moisture lovers be grown in bark, too? Sure, if it’s fine-textured. But be prepared to water more frequently.

    Step 1: Remove dead roots when repotting an orchid.

    Orchid media decomposes over time, especially bark. When this happens, the bark loses the fast-draining properties that many orchids prefer. That’s why it’s necessary to repot in new bark every year or two. It’s a simple two-step process. Just remove the orchid from the old bark, which you can just throw on the compost pile. Clip off dead roots (which will be dark and shriveled, compared to the firm, fleshy, light-color healthy roots). Place the orchid back into the pot and refill it with new bark.

    Fertilizing Orchids

    Step 2: Place the orchid into a slightly larger pot filled with fresh bark.

    A common recommendation is fertilizing with quarter-strength, water-soluble fertilizer each time you water. That means whatever the fertilizer label says to mix into the water, use only one-fourth that amount, and add it every time you water. This constant “spoon-feeding” is good for plants and ensures you never have to worry about when you fertilized last.

    Orchids and Light

    Homes generally have dim light (from a plant’s perspective), so orchids that tolerate low light levels stand a better chance than those that require strong light. An east-facing windowsill is a great spot to grow your orchid. The sunshine from an unscreened south-facing window can be a bit too bright (and hot), but a sheer curtain offers just the right amount of filtering. Or set the orchid back away from the window so that it’s not constantly in strong indirect light.

    West-facing windows make it simply too hot for orchids. However, with some filtering (as you would with a south-facing window) you might make a go of it. The light at a north window is usually just too dim for orchids.

    You may want to use a blooming orchid as a table centerpiece, or put it somewhere away from a window. There’s no harm in doing so, as long as you return the orchid to better light once it’s done blooming.

    Orchids and Humidity

    These orchids don’t require rain forest humidity, and may do OK in your home without extra measures. But the dry atmosphere of an air-conditioned home can be challenging. That’s why a daily mist, or setting orchids on a moist bed of gravel, helps success.

    One precaution: Orchid pots should sit atop the gravel, not nestled within it. Otherwise, you risk wicking moisture up through the bottom of the pot and saturating the roots.

    The Easiest Orchids for Novices

    Yellow nun orchid

    Three orchids are especially commendable (from a novice’s perspective): the nun’s orchid (Phaius); a closely related hybrid, Phaiocalanthe; and the tropical lady slipper orchids (Paphiopedilum, not to be confused with Cypripedium, a related but distinct type of lady slipper). They thrive with care similar to that of many houseplants: regular water and average light. If you can grow a ficus or a pothos, you can probably grow one of these orchids. It would be hard to overwater these moisture-loving orchids, which is important because that’s perhaps the most common way that people kill orchids.

    Moth orchid

    Phalaenopsis (the moth orchid) and Cattleya hybrids (the “corsage orchid”) prefer dry roots, so are vulnerable to being “loved to death” with too much watering, but are otherwise reasonably easy to grow. 

    Corsage orchid

    Another orchid worth noting is the Cymbidium. It’s a great orchid for Northerners because it responds to the short days of winter by flowering. In the South, with its relatively long winter days, it can be difficult to get to bloom. And like the other orchids we covered, Cymbidium can succeed in a home environment.

    Resources

    Pots: Try Charley’s Greenhouse Supply: charleysgreenhouse.com.

    To purchase orchids try the following companies:
    EFG Orchids: efgorchids.com
    Orchids.com: orchids.com
    Costa Farms: costafarms.com (They supply the orchids sold in Lowe’s, The Home Depot, and other retailers.)

    Learn more about growing and choosing orchids from the links below.
    The American Orchid Society: aos.org

    Oops, we’re sorry. Something went wrong. Please try again later.

    Oops, we’re sorry. Something went wrong. Please try again later.

    Share your take on this idea!
    Upload your photo here.
    CLOSE

    This content was originally published here.

  • Family Builds Backyard Pool Out Of Pallets And It’s Awesome

    Family Builds Backyard Pool Out Of Pallets And It’s Awesome

    After a long cold winter, that first sign of spring is one of the best sights I see all year! I’m a huge fan of summer and every single activity that comes along with it. I’m from a state that is known for having the greatest snow on Earth, but I’ll still take a blistering hot summer over a perfect, snowy winter any day. As soon as the temps reach a point that I can wear a tank top, shorts and flip-flops, you will find me outside enjoying the sun. One of my favorite summertime activities is definitely swimming. There’s nothing quite like taking a dip on a triple digit degree day in the middle of summer with a cold drink. Call me crazy but I love the heat. Growing up, I pretty much begged my parents every single year for a swimming pool. I was always disappointed that I never had a swimming pool in my yard until I grew up and started paying bills on my own. As an adult with my own house, I often think to myself, “who in their right mind would spend that amount of money on a pool?” Well it looks like I can now have a backyard swimming pool and save a small fortune by building it myself. I consider myself really handy but I don’t think I would be confident in tackling a DIY swimming pool. That was until I saw this DIY pallet swimming pool that you could easily set up in an afternoon. Take a look at how a family built this awesome DIY swimming pool and get started before summer is over!

    This family collected 9 full size pallets and stood them on end on a very level piece of ground in their backyard. Beneath the pallets, they placed a very durable, heavy-duty tarp.

    With all 9 pallets touching, they had to fasten them together for structural support. They nailed boards along the top that tie the pallets together. They cut and nailed boards down the sides of the pallets, where they meet, holding them together. After all the boards were in place, they ran some heavy-duty load straps around the entire assembly for added support and strength.

    Because the boards can be sharp and a little rough, they took simple sheets, blankets and towels and covered every single inch of the interior. They used a staple gun to fasten the sheets and blankets to the pallets. They made sure to double up the towels on the sharp corners to prevent any damage to the pool liner.

    With the protective layer of sheets in place, it was time to place the pool liner. They used a very large medium duty tarp. It was simply held up with duct tape in order to keep it in place before attaching it permanently.

    They cut boards that would serve as a shelf around the top edge of the DIY pallet swimming pool. They sanded these to prevent any slivers and screwed them into the tops of the pallet. Between this top shelf and the pallets, the pool liner is locked securely in place.

    They found some bamboo roll down blinds that were cut to the height of the pool. These give the exterior of the DIY pallet swimming pool a nice finish that looks like it came from the factory.

    After filling it with water and giving it a few days in the sun to warm up, this DIY pallet swimming pool is ready to cool you off on a hot summer day.

    This content was originally published here.

  • Hydrangea Serrata Care: Learn To Grow Mountain Hydrangea

    Hydrangea Serrata Care: Learn To Grow Mountain Hydrangea

    Hydrangea serrata [hy-DRAIN-juh serrata] is a deciduous shrub and a member of the family Hydrangeaceae.

    The plant is native to Korea and Japan.

    The genus name is derived from the Greek word, hydor, which means water combined with the Greek word, aggeion, which means vessel.

    The genus name refers to the plant’s capsular, cup-like fruit.

    The specific epithet, serrata, refers to the plant’s toothed or serrated leaves.

    Common names include:

    This plant grows naturally in moist areas in Japan and Korea. More details on Hydrangeas plant care.

    Hydrangea serrata is very much like Hydrangea macrophylla, but the overall size of the plant is smaller, and the leaves and flowers are daintier.

    Blood-On-the-Snow attains a height and spread of 2′ – 4′ feet.

    The plant’s height and spread may be stunted by very cold winters.

    Control growth by pruning the plant smaller.

    Foliage color is dark green.

    Leaves are oval with toothed edges.

    The simple, opposing leaves are 2″ – 6″ inches in length.

    Flowering & Fragrance

    Tea of Heaven bloom time is throughout early summer, mid-summer, and late summer.

    Blossoms may be either pink or blue depending on the alkalinity or acidity of the soil.

    Alkaline soil produces pink blooms, and acidic soil produces blue blooms.

    This is where hydrangea serrata ‘bluebird’ or ‘blue billow’ gets its name.

    Unlike many types of hydrangea, the flowers grow in flattened sterile floret clusters or lace caps.

    Sterile flowers form around the outer margins of the blossoms, and fertile smaller flowers grow in the center.

    Most H. serrata varieties bloom on old wood.

    Tuff Stuff is a variety which blooms on both old and new wood.

    Light & Temperature

    As a woodland plant, part shade is the ideal light setting.

    In areas with ample rainfall, the plant will tolerate full sun.

    In areas with low rainfall, it must have partial shade during the hottest times of the day.

    During dormancy, plants can survive temperatures as low as -13° degrees Fahrenheit (-25° C).

    If temperatures plummet in the springtime after new growth has begun, the plant may be killed.

    Hydrangea serrata is winter hardy in United States hardiness zone 6 and higher.

    It is possible to grow it in USDA zone 5 if you provide it with ample protection through the winter.

    You’ll need to mulch around it heavily and provide a burlap wrap.

    Watering & Feeding

    Mountain Hydrangea requires medium water.

    Keep a well-draining, evenly moist soil.

    Soil & Transplanting

    Well-draining soil is a must, but this plant can tolerate various types of soil from light to heavy.

    This plant grows best in acidic soils (soil pH level 4.5), but a wide range of pH values are acceptable and will produce different colored blossoms.

    Neutral to alkaline soil produces pink flowers.

    Acidic soil turns hydrangeas blue. Learn more about how to make Hydranegas blue.

    Some pH levels will produce lilac flowers.

    Although it’s important to prevent having it from standing in water, it’s equally important to prevent the drying of the roots.

    A well-draining, loamy soil is best.

    Grooming & Maintenance

    This deciduous shrub has a compact size and a naturally rounded growth habit so it requires very little grooming and maintenance.

    After your Mountain Hydrangea has flowered, you should prune it.

    Cut back the flowering stems to the first healthy set of buds.

    In early spring, cut away any winter damaged or weak stems.

    How To Propagate Mountain Hydrangea

    To grow from cuttings, take a 5″ – 6″ inches long cutting from a lower branch.

    You should not need to water again, and you should see roots within two or three weeks.

    Hydrangea Pest or Disease Problems

    Harsh winters may cause the plant to die back to the ground.

    Blooming in the subsequent springtime may be negatively impacted.

    Serrated Hydrangea experiences few disease and insect problems.

    You may occasionally see aphids (plant lice) on the plants.

    Overcrowding and excessive watering can lead to fungal problems such as mildew, leaf spot, bud blight, and bacterial wilt.

    Hydrangea serrata is not deer resistant.

    Is Hydrangea Toxic Or Poisonous?

    Even though some parts of the plant are edible, it’s considered toxic and listed as having poison characteristics.

    Some sources assert the flower buds, leaves, and bark are poisonous if ingested and will cause sweating, vomiting, stomach pain, and nausea.

    The toxic principle of the plant is a cyanogenic glycoside called Hydrangin.

    It’s worth noting this plant is only considered toxic if large amounts are consumed.

    The young leaves are used to make a Japanese sweet tea known as amacha.

    This tea is used in many Buddhist ceremonies.

    The leaves may also be distilled to create a sweetener.

    It’s also possible to dry and powder older leaves to use as a spice.

    Young shoots and leaves may be added to a stir-fry.

    Is Hydrangea Invasive?

    There is no indication Hydrangea serrata is considered invasive.

    Suggested Uses for Tea of Heaven

    Grow groups of hydrangea serrata in sheltered locations such as the border of a hedge or close to your home or an outbuilding.

    Individual plants can make nice specimen plants as long as they are provided with good shelter from harsh weather.

    Good uses of this plant include naturalizing in a forest or meadow setting or use in the landscape like an old wood shrub.

    The long-blooming lacecap flowers attract pollinators.

    Given the right setting (a large enough container and space to grow) this compact hydrangea makes a good indoor container plant.

    This content was originally published here.

  • How to Stage Your Refrigerator When Selling Your Home

    How to Stage Your Refrigerator When Selling Your Home

    Cleaning, depersonalizing and  a home before listing it for sale are some important tasks sellers should consider. This is because a clean and depersonalized space helps potential buyers envision themselves living in the home. But, staging your refrigerator? During showings, potential buyers will likely take time to look around the entire home to inspect its condition in full — this may include looking inside cabinets, under rugs and, yes, even inside the refrigerator. If you’re getting ready to sell your home, consider these staging tips for your fridge.

    Clean the Refrigerator’s Interior and Exterior

    You likely won’t want potential buyers to open up the refrigerator to be greeted by dried-on, sticky messes or foul odors. Kitchens are a big selling point for homebuyers, says The Balance, so it’s important to make sure it’s clean — and that includes the fridge. Take all of the items out of the refrigerator, as well as any removable drawers or shelves, and give everything a thorough wipe down. Be sure to scrub away stuck-on spills and clean up food particles that may have gotten into any nooks and crannies. If you need to eliminate unpleasant odors, spreading some baking soda or coffee grounds on a tray and placing it inside the fridge for a few days may help, says MarthaStewart.com.

    Additionally, don’t forget about the exterior of your refrigerator. If you have stainless steel appliances, make the outside shine with a stainless steel cleaner (that won’t leave streaks behind), and take time to scrub away sticky fingerprints, recommends MarthaStewart.com.

    To prevent messes from building back up in the refrigerator, clean up spills right away, before they have time to dry. MarthaStewart.com also says that wiping off the rims and lids of jars or containers before popping them in the fridge can help.

    Declutter and Reorganize Your Food

    After you’ve cleaned the refrigerator, it’s time to put the food back inside. While you’re doing this, look for any spoiled or expired food items and throw them in the trash. You should also consider moving nonperishable cans or bottles, such as soda or bottled water, to the pantry to free up room for items that really need refrigeration, recommends Good Housekeeping. To keep things looking tidy and organized, put leftovers in stackable, square containers (round containers typically take up more space), and use bins to organize similar items.

    Depersonalize Your Refrigerator’s Exterior

    When it comes to the exterior of your fridge, less is better, says Realtor.com. It’d be a good idea to store any personal items, papers and photos that were hanging on your fridge in a box. It can help buyers to better envision themselves living in the home and making their own memories.

    A staged refrigerator may not be someone’s deciding factor when it comes to buying your home, but it can help you to leave a better impression on potential buyers. Remember these tips as you begin to clean so your fridge is ready for all the showings ahead.

    Originally published on September 30, 2013.

    The post How to Stage Your Refrigerator When Selling Your Home appeared first on The Allstate Blog.

    This content was originally published here.

  • How to Set Up a Smart Kitchen

    How to Set Up a Smart Kitchen


    Modern luxury hi-tek black and white kitchen, clean interior design, focu at oven with open door
    Serghei Starus/Shutterstock


    Your kitchen is full of appliances, but they’re dumb. Technology, like smart speakers, lights, ovens, and faucets, can make cooking, cleaning, and grocery shopping easier. Creating a smart kitchen isn’t hard, and everyone in the home can benefit. Here’s how.

    Why a Smart Kitchen?

    Your kitchen is a room of productivity and mess. You cook your meals, clean your dishes, and maybe even eat in your kitchen. Every cabinet, utensil, and tool contributes to your kitchen experience, for better or worse. And adding intelligence to your cooking space can improve your recipes and speed up the work.

    Kitchens can host some of the most useful smarthome technology in your home. You can buy smart ovens that take the guesswork out of cooking times and suggest recipes you may not have tried or a smart faucet that you can turn on and off by voice, or ask to pour a set amount of water. But it’s not all big, flashy new appliances.

    A smart display like the Nest Hub or Echo Show can convert measurements for you, set timers, or show the next steps of a recipe you’re working on, and smart lights are an inexpensive way to improve the lighting in your kitchen. For example, smart light switches can save you money by turning everything off at scheduled times, and smart LED strips can light the dark spaces under a cabinet.

    Every kitchen is unique, but the advantage of creating your smart kitchen is choosing just the technology that you benefit from and skipping everything else.

    Start With a Smart Speaker or Display

    An Echo next to a tea pot, a SimpliSafe, and two cutting boards.
    This Echo really helped cut down the time to make a grocery list. Josh Hendrickson

    Smart ovens and faucets are impressive, but the first thing we recommend for every kitchen is also the cheapest: A smart speaker like an Amazon Echo or Google Home. Or, better yet, a smart display like the Nest Hub or Echo Show.

    Echo Dots and Google Home Minis can typically be found in the $30 to $50 range, depending on sales, and the functionality they provide goes well beyond the cost. Google’s Nest Hub (formerly known as the Google Home Hub)and Amazon’s Echo Show cost a bit more at $129.99 and $229.99, respectively, but add a lot over a basic smart speaker.

    With a smart speaker, you can set multiple named timers to keep track of your food cook times. If your recipe calls for a measurement you don’t have, you can ask for a conversion, like “how many teaspoons in two tablespoons?” or “how many cups in a liter?” when you need to convert to another measuring system.

    Smart speakers also serve as an intercom if you spread them throughout your home, so you can easily announce when dinner is ready. And to keep yourself entertained, you can listen to music while you cook.

    Read the remaining 22 paragraphs

    This content was originally published here.

  • the july garden chores – A Way To Garden

    the july garden chores – A Way To Garden

    JULY DAY is a stern little conversation or two (or 10): with myself, to push onward; with certain weeds to please stop being so pushy; with the sky (if things get hot and dry) to please, please, please consider the regular concept of proper, soaking rain.

    Often, as July begins–especially if it does so with a heatwave, as in 2018, and in 2019 with our first summery weather after a generally cold spring–I want to throw in the trowel; mow the whole place down or turn it under (think: bulldozer).

    Years ago, I wrote an essay, confessing that July always starts out as Throw In the Trowel Month for me, as in: “I give up!” If you’re feeling stuck, like the garden just isn’t “working,” it might help to read it.

    Thankfully, though, there is payoff—new potatoes, a tomato finally, perhaps, and then garlic harvest as the month winds on. There are also problems to be managed (hello, Japanese beetles, and squash bugs), plus more plans to be put into place, to get from here to fall without getting engulfed, and overwhelmed. That’s July in the garden here: busy, but with benefits.

    Raise the mower deck; man the sprinklers; get out the vegetable seeds for succession sowings. Pull weeds, and handpick pests. Diligence on all fronts will be rewarded, but I know it’s daunting—and that the view out the window right now can be paralyzing–though I do love the avian ruckus in all my twig dogwoods, whose fruit is attracting birds galore right now, and will soon be disappeared, every last bit. Oh, and clean out the freezer to make room for incoming.

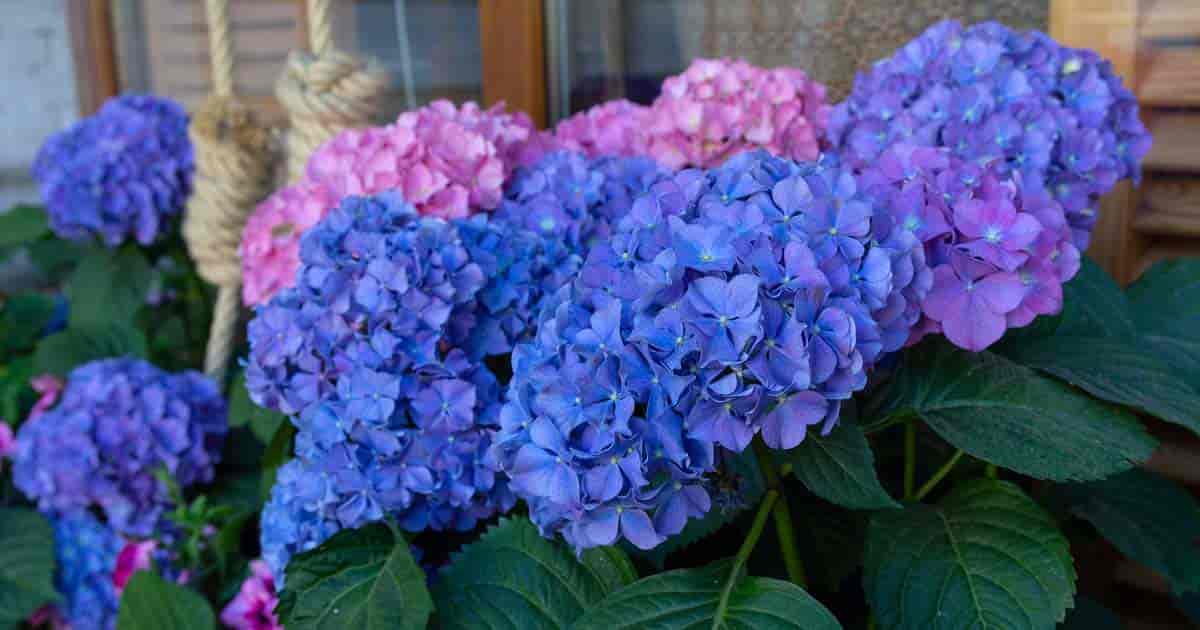
    If I push through, summer usually shapes up, and the tall annuals and perennials, ornamental grasses, the fresh white blooms of hydrangeas, and those heat-loving vegetables we’ve waited all year to taste again, have their day. I’m always glad I summoned the energy to plow forward through the July chores.

    garden elsewhere? regional links

    THE ORGANIC-GARDENING approach and the how-to tips I offer apply most anywhere–pruning a rose or sowing a tomato seed is similar, wherever the rose or tomato may grow. But the when is not the same. To adjust timing: My garden is in Zone 5B, in the Hudson Valley (NY)-Berkshires (MA) area, where frost can persist well into May and return in October. You may need next month’s chores, or last month’s (the archive is here). For more Zone-specific advice, I’ve rounded up links to calendars and checklists from around the nation (and the U.K.). But read on first, because I’m betting there’s something here for you, wherever you may dig, weed, or prune.

    weeding and watering

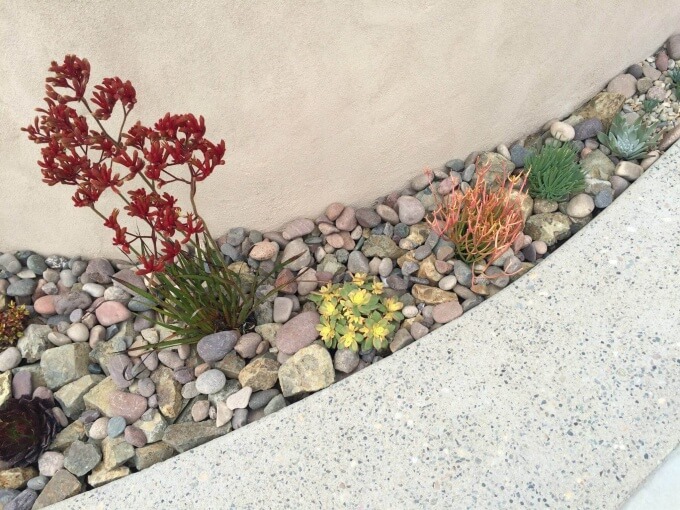
    MAKE A PASS through each garden bed each week, since weeds are not just unsightly but steal moisture, nutrients and light. Top up mulch where needed (or maybe you need a layer or cardboard or newsprint first?). First: Learn to identify your opponents, and the tactics and timing for best control. You cannot outsmart a plant whose life cycle you do not understand.

    OBSERVE WHILE WEEDING: Make notes, to plan for fall reworking of problem spots–areas that seem to invite weeds to sow with abandon, like the driveway, or other gravel surfaces, or cracks between pavers. Again, decision time: To solarize (lay down plastic sheeting, and use summer heat and sun to cook the weeds to death)? Or to spray? I say no to chemical herbicides, so there are sheets of plastic here and there, and the scuffle hoe (a push-pull long-handled tool sometimes called a Dutch hoe) is getting a workout, too, especially in the driveway gravel.

    GARDENS NEED AN INCH OF WATER a week. Check your rain gauge to see if the heavens provided it. Soak beds deeply in the root zone, but don’t spritz with a sprayer now and again like you’re washing the car. Containers, especially smallish ones in sun, need daily attention, and periodic feeding. Be alert!

    IF YOU ARE IN JAPANESE BEETLE territory, handpick each morning and again late day. Drown in a container of water. We can’t eliminate them; we have to manage them once they resume activity, around July 4 in my zone. Consider a biological (non-toxic) control to further help reduce overwintering grub population with nematodes, or one of the other biologicals covered in this government bulletin for homeowners (pdf). Ken Druse and I chatted about various tactical approaches we’ve taken to them in this story and podcast.

    WITH OTHER OBVIOUS pests like tomato hornworms, squash bugs, Colorado potato beetles or imported cabbage worms, I do the same: handpick early each morning, and destroy.  And then I will do a very serious fall cleanup, removing all debris to a distance (I compost it at my office, where there is no vegetable garden). As with weeds, learning what your bugs are by name is a good thing.

    GETTING TO KNOW your garden insects–good, bad, ugly–can help you be a better gardener. Here is how (and an encyclopedia of them I recommend).

    MAKING MORE HABITAT for “natural enemies” (the so-called “good bugs”) is key to the bigger picture of a healthy, manageable garden. Here is how.

    OR MAYBE SLUGS AND SNAILS are proliferating? Some tactics on dealing with them.

    ASIAN JUMPING WORMS are lately one of the most-feared recent invaders of all, degrading soil in not just gardens but also in our natural forests. What we know about them.

    vegetable, fruit and herbs

    EVEN UP NORTH, there is so much vegetable- and herb-harvest potential ahead. Plan a prolific fall garden by starting with this how-to, which includes tips for dealing with hot, dry soil and making a succession-sowing calendar.

    POSSIBILITIES ARE MANY, including carrots, beets, radishes, lettuce, dill, basil, brassicas including cabbage, broccoli, and broccoli cousins such as spigarello, and kales, plus fall peas. More bush beans and another mound of bush cukes and zucchini are going in here right this very minute (your timing may vary; I am Zone 5B).  More about planning the fall vegetable garden.

    GARLIC may start to fade and topple, as harvest time nears. When several lower leaves yellow, but about five topmost ones are still green—some experts say four or five, some say five or six–carefully lift a head or two to judge readiness. If good, lift all to cure during a warm, dry spell in an airy, sheltered place. How to judge the right harvest moment. Or read all about growing garlic, and even storing your harvest–and don’t forget, order bulbs now for October-ish planting.

    TOMATO TROUBLES? If your plants are having issues, like spots on leaves or disfigured fruit, start here.

    SEND IN SOIL SAMPLES for testing if you’re seeing poor results in some beds. Contact your local cooperative extension for details on how to sample and where to send it. Don’t just dump fertilizer or other amendments into beds without knowing what is going on. Here is why.

    STRAWBERRY BEDS may appreciate rejuvenation now.

    KEEP ASPARAGUS well weeded and water it, too. Let asparagus ferns grow till hard frost to nourish the underlying crowns.

    FOR PEAK FLAVOR, basil, sage, marjoram and oregano, mint, tarragon are best harvested just before bloom. Start more basil from seed for combining with those September tomatoes, and dill for late pickles. Harvest lavender, rosemary and chamomile as they flower, blossoms and all.

    trees & shrubs

    STOP FEEDING woody plants, especially if you’re in a zone that has a cold winter. Promoting more soft growth in high summer and beyond isn’t good; time for them to start moving naturally toward the hardening-off phase of their cycle. No more fertilization till late winter or earliest spring.

    TREES ARE vulnerable to drought, if you’re having a dry year, particularly the oldest and the youngest (those planted in the last few years). Water slowly and deeply, as with a Tree-Gator. Ugly…but better than not watering.

    ALWAYS BE on the lookout for dead, damaged, diseased wood in trees and shrubs and prune it out as discovered. Ditto with suckers and water sprouts.

    SPRING-FLOWERING shrubs like lilacs reach the end of their pruning window after July 4th here, otherwise too-late pruning risks removal of emerging buds for next year’s blooms.

    THROUGH MONTH’S END, softwood cuttings of buddleia, weigela, rose-of-sharon and roses, among other shrubs, can be taken to propagate more plants inexpensively.

    flower garden

    MORE CUTBACKS. In many spots I’m being downright brutal with more “edits” and cutbacks. (I know, I gave a lot of haircuts in June to things like perennial geraniums and euphorbias. But the barbershop is still open here apparently, with bleeding hearts, groundcover sedums that flowered recently, Phalaris or ribbon grass, and more getting hacked to the ground. Celandine poppy, or Stylophorum diphyllum, too—anything whose foliage looks insipid and is just an invitation for slugs as it yellows and flops.)

    HAVE DESIGN ISSUES, with the yard just not hanging together visually? Landscape architect Thomas Rainer offered some valuable tips on reducing lawn areas and massing plants for visual impact, and designer and nursery owner Katherine Tracey told us how to critique our own yards. If you’re feeling stuck, I suggest both articles as a start.

    PRUNE RAMBLER ROSES and once-blooming climbers now, after their flowering period.

    ROSE ROSETTE DISEASE, caused by a virus transmitted by a mite, is affecting more roses in widening areas. Learn how to diagnose this scourge and what to do (including to remove affected plants, roots and all, at once; bag and dispose in trash).

    MANY PERENNIALS and biennials can be started now from seed, then set out in the fall into nursery beds.

    I MOW THE foliage of my ripened daffodil drifts around July 4th. Deadhead faded perennials unless they have showy seedheads (same with bulbs), or you want to collect seed later (non-hybrids only).

    ARE ANNUAL VINES getting the continuing support they need, whether twine, wire, lattice? Perennial types like Clematis may need a bit of help, too.

    ORDER BULBS to get varieties you want (see Resources for catalog suggestions). Remember our “early, middle, late” mantra when doing so, so that you choose varieties with staggered bloom times for a long display.

    PREPARE NEW beds for fall planting by smothering grass or weeds with layers of recycled corrugated cardboard or thick layers of newspaper, then put mulch on top.

    RE-EDGE BEDS to make a clean line and define them, and keep edges clean with regular fine-tuning with grass shears. A clean edge makes a big difference, and I often topdress with a little more mulch to prevent weed seeds from proliferating, too.

    wildlife-garden ideas

    WANT MORE WILDLIFE, including birds? Here’s how to create a habitat garden, and also a Q&A with wildlife ecologist Doug Tallamy of the University of Delaware on creating backyard habitat.

    HEARD ABOUT ‘NATIVARS’–cultivated varieties of native plants that may have showier foliage or flowers, or be otherwise extra appealing to gardeners? Research about how effective they are in supporting pollinators and other beneficials may surprise you.

    SPEAKING OF WILDLIFE MAGNETS: Will this be the year you add water, whether in-ground or simply an easy, seasonal trough like this?

    SICK OF MOWING? Less lawn means space for more diverse plantings, and therefore support of more wildlife diversity from insects on up. Do you want to mow differently (as I did the last three years to good result)?

    SICK OF DEER? Maybe it’s time to plan for upgrades in deer control. If by this point in winter you have tired of deer damage, perhaps this will be the year you fence the yard, or at least a key area, using one of these approaches. Also: deer-thwarting advice from Ohio State’s wildlife expert, applicable no matter where you garden.

    DON’T BAG or rake clippings; let them lie on the lawn to return Nitrogen to the soil. Be careful not to mow too low in summer’s heat. Scalped areas are prime targets for crabgrass to emerge in.

    compost heap

    DON’T LET the heap dry out completely, or it will not “cook.” Turning it to aerate will also hasten decomposition, but things will rot eventually even if not turned. Composting 101 with expert Lee Reich.

    need help in other regions?

    AGAIN: I’m in the Northeast, in Zone 5B. For more Zone-specific advice, I’ve rounded up a new page of links to calendars and checklists from around the nation.

    This content was originally published here.

  • 8 tips to help you sleep during a heatwave – The News

    8 tips to help you sleep during a heatwave – The News


    THE temperatures have been soaring as summer well and truly arrives in Portsmouth. 

    But it can be trick to get a good nights sleep when it is so hot. 

    Here are The Sleep Council’s top tips to help stay cool and get your fourty winks this summer:

    – Open windows – and doors – to create a cool draught through your bedroom, and keep curtains or blinds drawn during the day to keep the sun out and your room cooler at night.

    – If you’ve got an attic, try opening the hatch. Hot air rises and this will give it somewhere to go. Get rid of the duvet and blankets and sleep with just a cotton sheet – or a duvet with a low tog rating. Wear light cotton nightwear – this is actually better than wearing nothing at all as natural fabric will absorb any perspiration. Have a cool shower or bath before bedtime to lower your core body temperature.

    –  Drink plenty of cold water during the evening and keep a glass by the bed.

     Avoid too much caffeine, alcohol or a big meal before bedtime as this can make you feel hot in the middle of the night because of dehydration and overactive digestion.

    – Pull out your hot water bottle, but fill it with ice cold water and have it in bed with you. Cool a pillow case in the fridge before bedtime or try one of the new cooling pillows that are available to buy – both will help you keep a cool head!

    – If you share a bed, make sure it’s big enough for two people so you can sleep without disturbing each other – a 5ft wide bed should be your minimum.

    – Also, try putting socks in the fridge and wear them in bed – cooling your feet lowers the overall temperature of your skin and body, ideal during a hot summer’s night. Use an electric fan to cool you down at night.

    – If it’s really hot, put a tray of ice and a little water in front of the fan which will cool the air even more.

    This content was originally published here.